ASP.NET Core Razor Pagesでスキャフォールディングを実行する
- 作成日 2021.04.02
- 更新日 2022.02.15
- ASP.NET Core Razor
- ASP.NET Core

ASP.NET CoreでRazor Pagesを使用するまでの手順を記述してます。.NET Coreのバージョンは3.1を使用してます。
環境
- OS windows10 pro
- IDE Visual Studio 2019
- .NET Core 3.1
- SQL Server2019 Express
プロジェクト作成
Visual Studio 2019からプロジェクトを作成します。
ASP.NET Core Webアプリケーションを選択します。
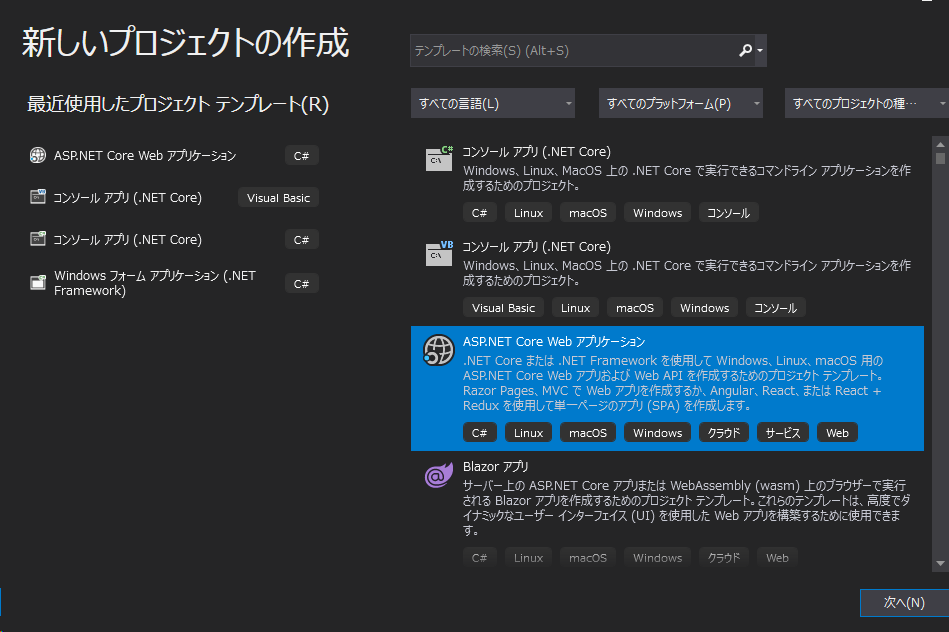
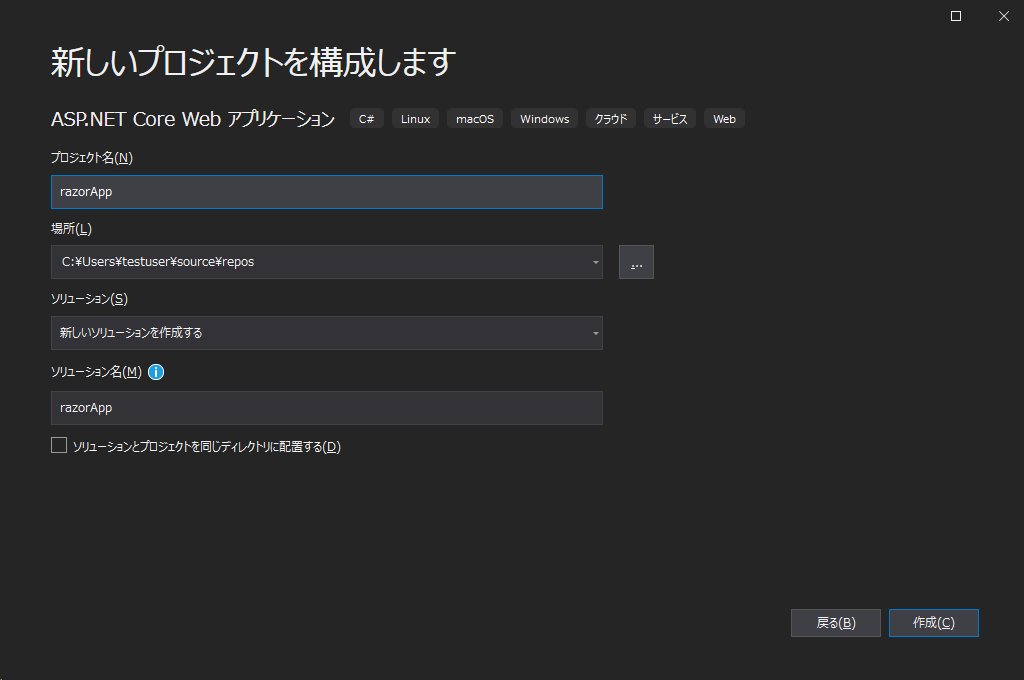
razorAppという名前でプロジェクトを作成してます。
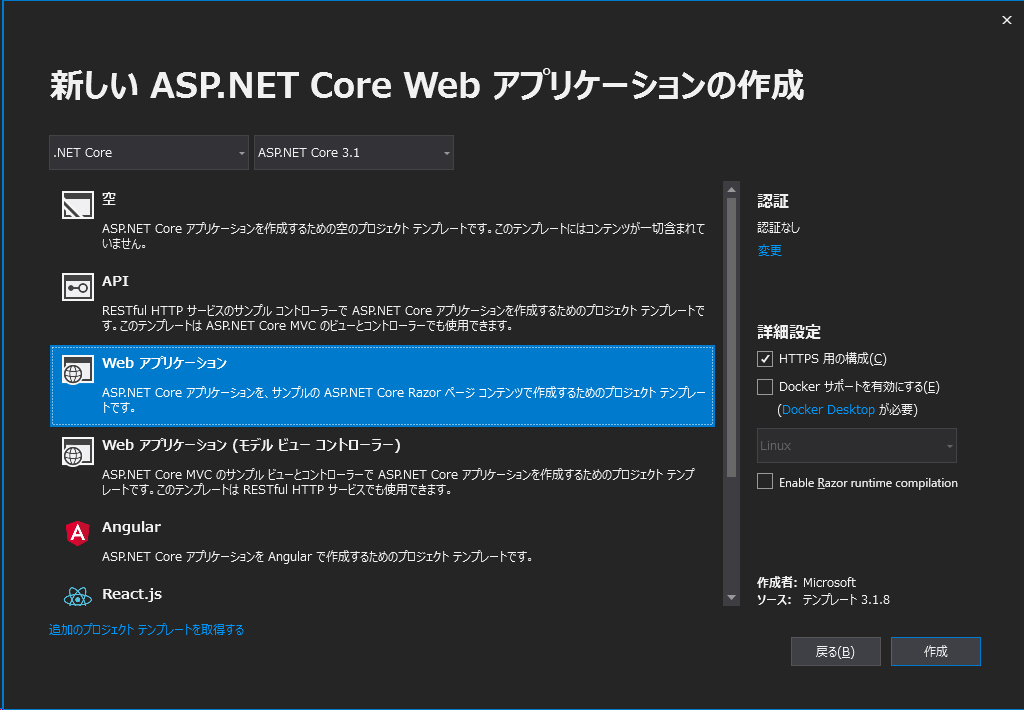
「web アプリケーション」を選択します。
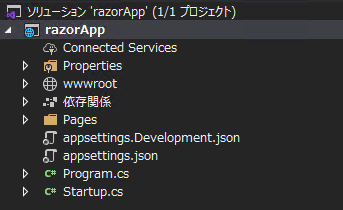
プロジェクトが作成されます。
パッケージ追加
NuGetパッケージから以下の3つをインストールしておきます。
- Microsoft.EntityFrameworkCore
- Microsoft.EntityFrameworkCore.SqlServer
- Microsoft.EntityFrameworkCore.Tools

DB接続文字列追加
「appsettings.json」と開発用の「appsettings.Development.json」にSQL Serverとの接続文字列を追加しておきます。
サーバー localhost
DB名 sample
ユーザー名 sa
パスワード password
"ConnectionStrings": {
    "DefaultConnection": "Server=localhost;Database=sample;User ID=sa;Password=password;"
},
Modelsクラス作成
まずはプロジェクト配下に「Models」フォルダを作成して、そこに「Book.cs」を作成します。

「Book.cs」を以下のように記述します。
using System;
using System.Collections.Generic;
using System.Linq;
using System.Threading.Tasks;

namespace razorApp.Models
{
    public class Book
    {
        public int ID { get; set; }
        public string Title { get; set; }
        public int Price { get; set; }

    }
}
マッピング
マッピングを行うため、プロジェクト配下に「Data」フォルダを作成して、そこに「BookContext.cs」を作成します。

「BookContextContext.cs」を以下のように記述します。
using System;
using System.Collections.Generic;
using System.Linq;
using System.Threading.Tasks;
using Microsoft.EntityFrameworkCore;
using razorApp.Models;

namespace razorApp.Data
{
    public class BookContext : DbContext
    {
        public BookContext(DbContextOptions<BookContext> options)
    : base(options)
        {
        }

        public DbSet<Book> Books { get; set; }
    }
}
サービス登録
「Startup.cs」にサービスと接続情報を登録します。
using System;
using System.Collections.Generic;
using System.Linq;
using System.Threading.Tasks;
using Microsoft.AspNetCore.Builder;
using Microsoft.AspNetCore.Hosting;
using Microsoft.AspNetCore.HttpsPolicy;
using Microsoft.Extensions.Configuration;
using Microsoft.Extensions.DependencyInjection;
using Microsoft.Extensions.Hosting;
using Microsoft.EntityFrameworkCore;
using razorApp.Data;


namespace razorApp
{
    public class Startup
    {
        public Startup(IConfiguration configuration)
        {
            Configuration = configuration;
        }

        public IConfiguration Configuration { get; }

        // This method gets called by the runtime. Use this method to add services to the container.
        public void ConfigureServices(IServiceCollection services)
        {
            services.AddDbContext<BookContext>(options => options.UseSqlServer(Configuration.GetConnectionString("DefaultConnection")));
            services.AddRazorPages();
        }

        // This method gets called by the runtime. Use this method to configure the HTTP request pipeline.
        public void Configure(IApplicationBuilder app, IWebHostEnvironment env)
        {
            if (env.IsDevelopment())
            {
                app.UseDeveloperExceptionPage();
            }
            else
            {
                app.UseExceptionHandler("/Error");
                // The default HSTS value is 30 days. You may want to change this for production scenarios, see https://aka.ms/aspnetcore-hsts.
                app.UseHsts();
            }

            app.UseHttpsRedirection();
            app.UseStaticFiles();

            app.UseRouting();

            app.UseAuthorization();

            app.UseEndpoints(endpoints =>
            {
                endpoints.MapRazorPages();
            });
        }
    }
}
Migration実行
パッケージマネージャーコンソールを開いて、Migrationを実行します。
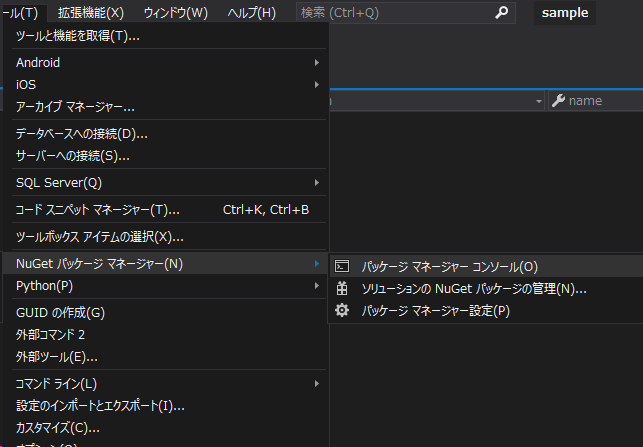
以下のコマンドを実行します。
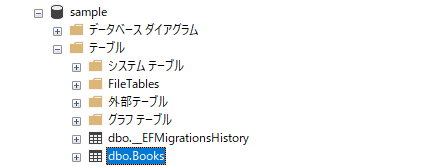
Add-Migration Initialテーブルを作成します。
Update-Databaseテーブルが作成されていることが確認できます。
スキャフォールディング実行
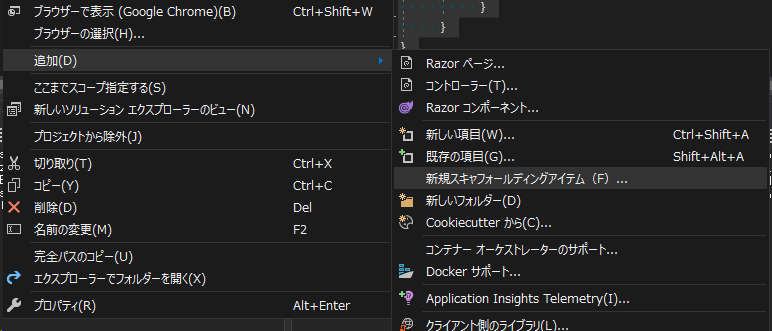
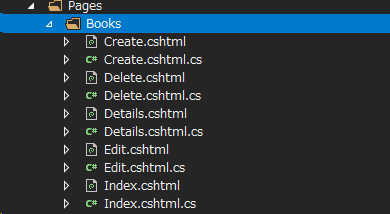
「Pages」配下に「Books」フォルダを作成します。

作成した「Books」を右クリックして、新規スキャフォールディングアイテムをクリックします。
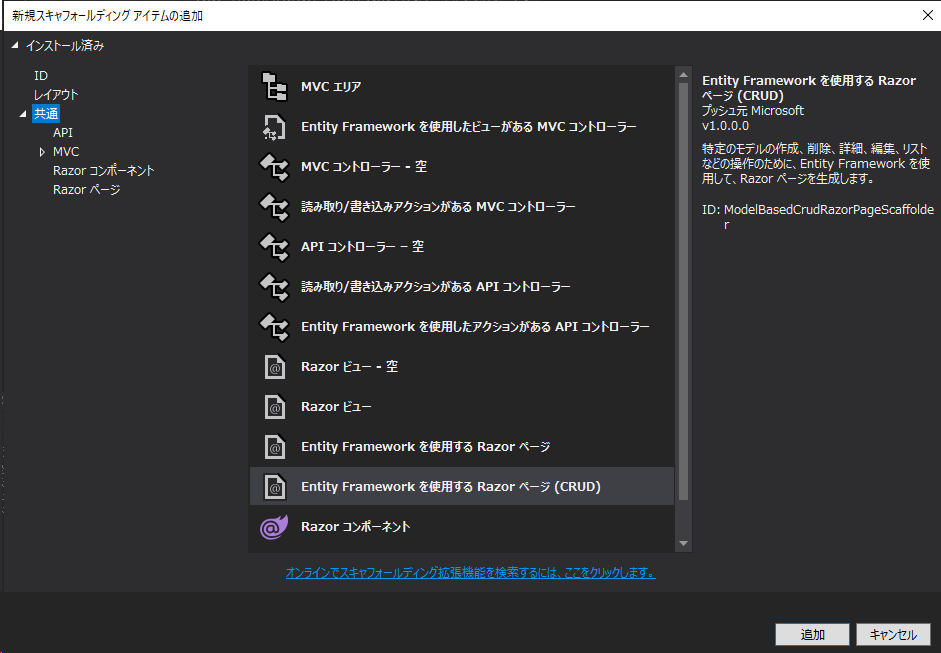
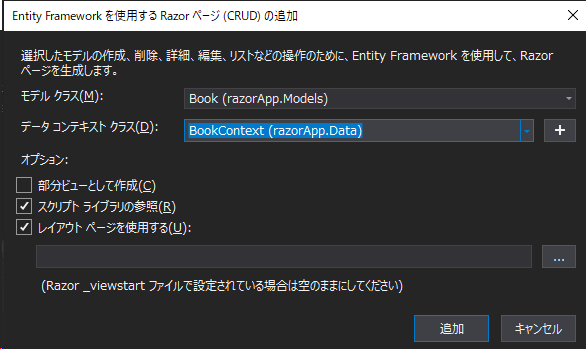
「Entity Framework を使用する Razor ページ (CRUD)」を選択します。
モデルとデータコンテキストクラスを設定します。
これで、「Books」に以下のページが追加されます。
確認
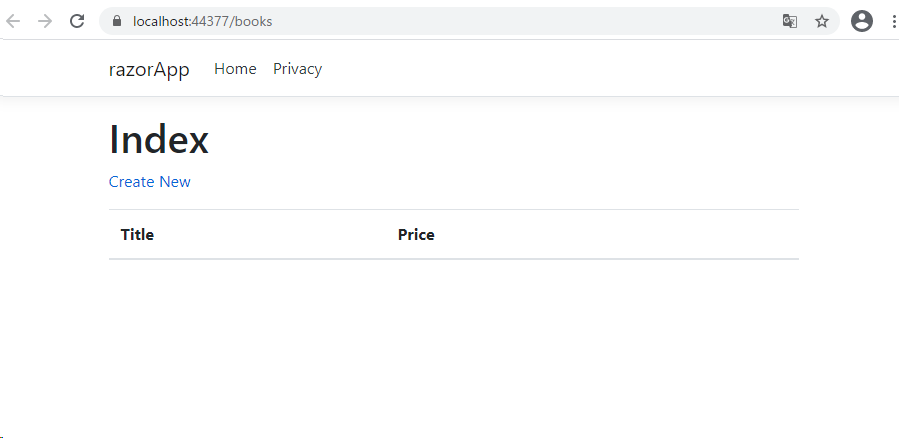
「Ctrl」+「F5」で実行してブラウザから http://localhost:ポート番号/books にアクセスすると、以下のページが表示されます。
-
前の記事

rails6 バリデーションを設定する 2021.04.02
-
次の記事

go言語 文字列内の指定した文字列をカウントする 2021.04.02