ASP.NET Core Blazorでsqlserverに接続してデータを表示する
- 作成日 2022.01.19
- 更新日 2022.01.21
- ASP.NET Core
- ASP.NET Core

ASP.NET Coreを使ってBlazorでsqlserverに接続してデータを表示する手順を記述してます。.NET Coreのバージョンは6を使用してます。
環境
- OS windows10 pro
- IDE Visual Studio 2022
- .NET Core 6
- Sql Server 2019
Blazorプロジェクト作成
プロジェクト作成時に「Blazor WebAssembly」アプリを選択します。
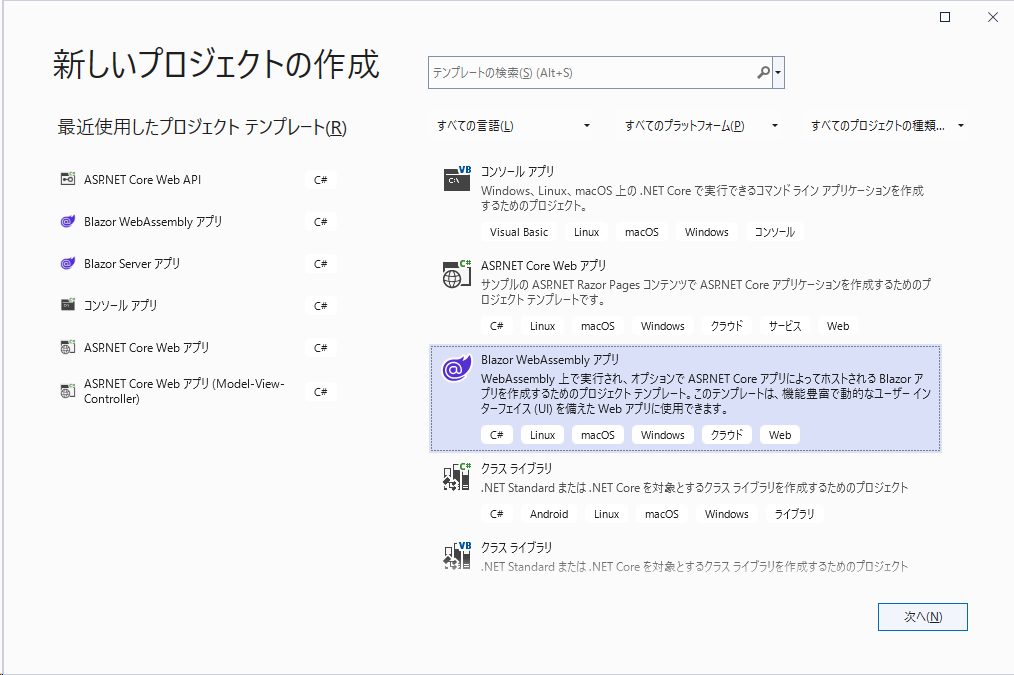
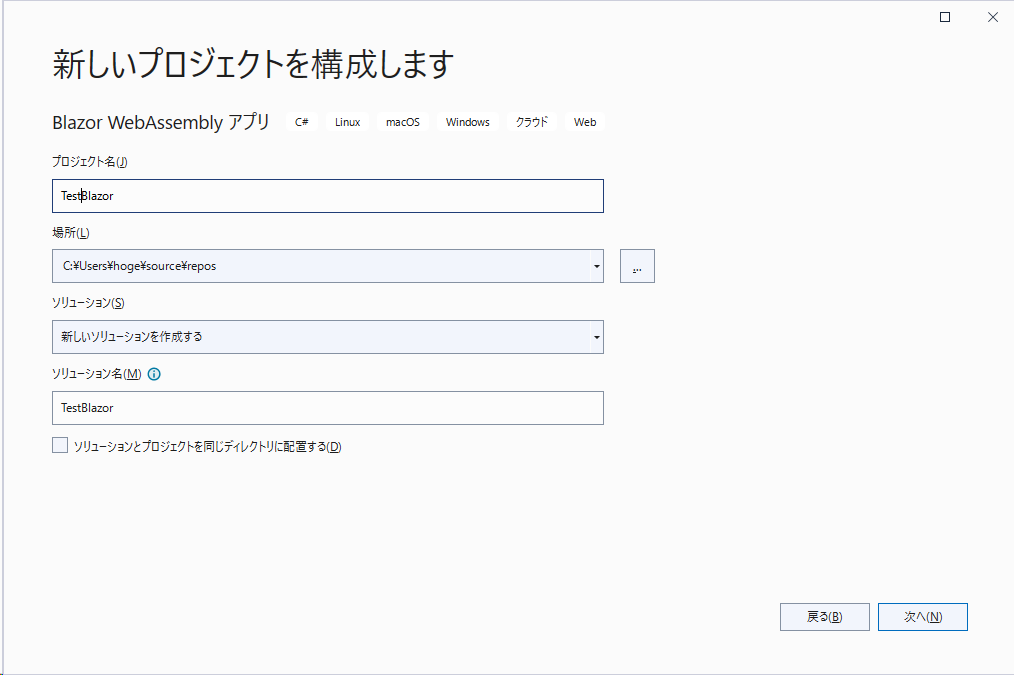
任意の名前でプロジェクトを作成します。
※ここでは「TestBlazor」という名前で作成してます。
「ASP.NET Coreでホストされた」をチェックして、「作成」ボタンを押下します。
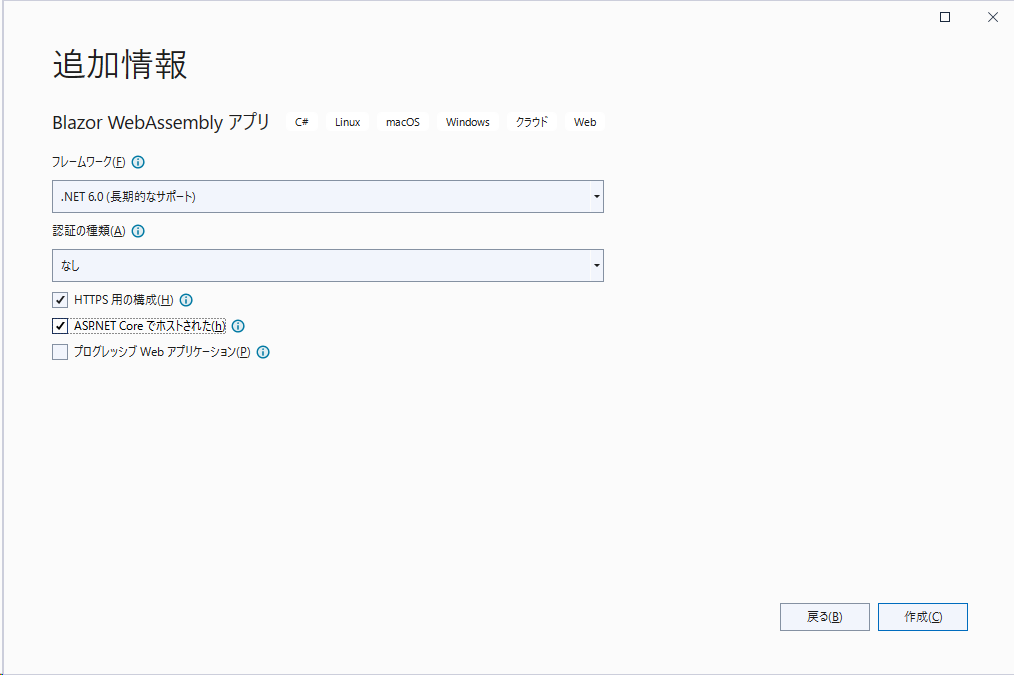
ASP.NET Core Blazor WebAssemblyでプロジェクトを作成すると、クライアント用とサーバー用と共通の3つのプロジェクトが作成されます。

そのままビルドして実行すると、サンプルを起動することができます。
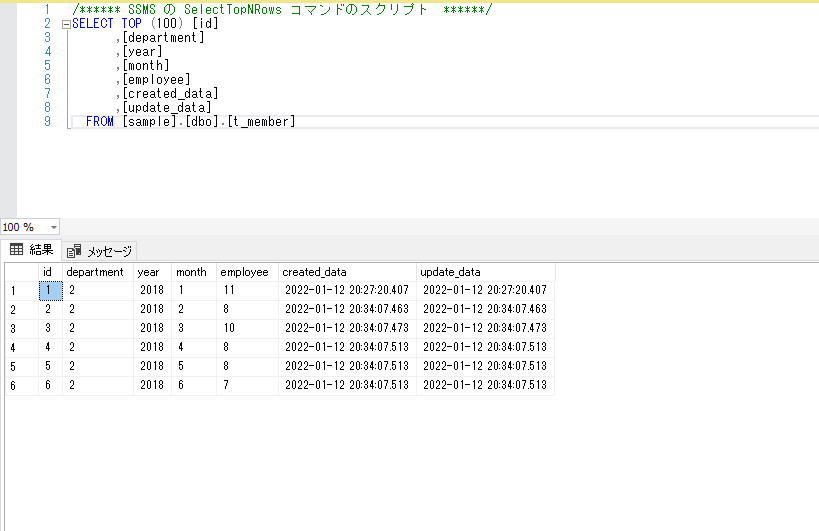
使用するSqlServer
DB「sample」にある「t_member」というテーブルを使用して、データを表示してみます。
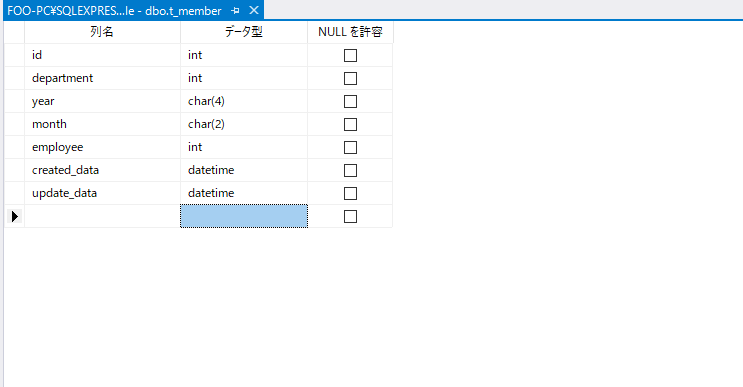
以下のデータが存在します。
パッケージ追加
事前に使用するパッケージを追加しておきます。
「ツール」 > 「NuGet パッケージ マネージャー」 > 「パッケージ マネージャー コンソール」を選択します。
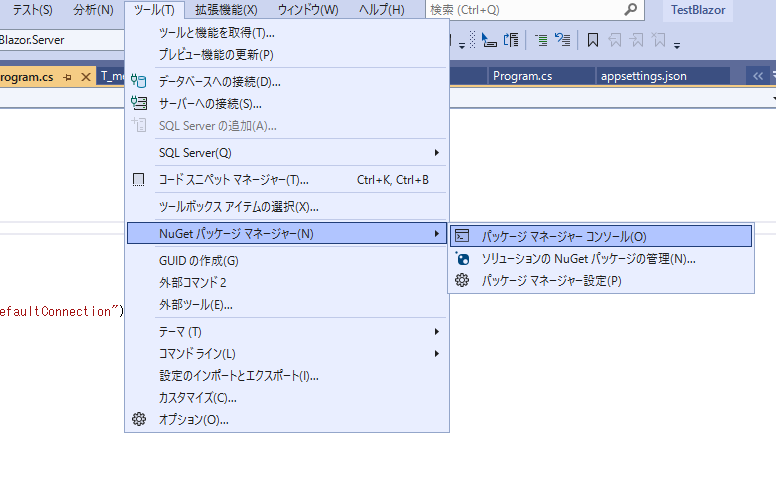
以下の2つを「Server」の方のプロジェクトに追加します。
PM> Install-Package -ProjectName TestBlazor.Server -Id Microsoft.EntityFrameworkCore.SqlServer
PM> Install-Package -ProjectName TestBlazor.Server -Id Microsoft.EntityFrameworkCore.Tools
接続情報
sqlserverと接続できるように接続情報を用意します。
「appsettings.json」に、以下のコードを追加します。
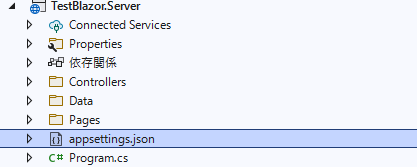
「ConnectionStrings」を追加します。
{
  "Logging": {
    "LogLevel": {
      "Default": "Information",
      "Microsoft.AspNetCore": "Warning"
    }
  },
  "AllowedHosts": "*",
  "ConnectionStrings": {
    "DefaultConnection": "Server=192.168.xxx.xxx;Database=sample;User ID=sa;Password=password;"
  }
}
Model作成
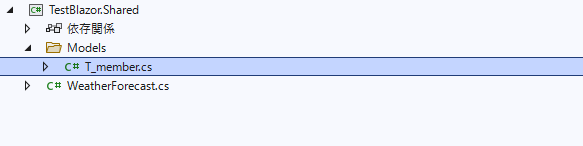
まずはModelを作成します。「Shared」に「Models」フォルダを作成して
「T_member.cs」というファイルを作成します。
以下の内容でコードを記述します。
namespace TestBlazor.Shared.Models
{
public class T_member
{
public int Id { get; set; }
public int Department { get; set; }
public string? Year { get; set; }
public string? Month { get; set; }
public int Employee { get; set; }
public DateTime Created_data { get; set; }
public DateTime Update_data { get; set; }
}
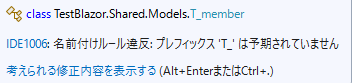
}名前付けのルール違反と警告されますが、ここではこのまま進めます。
コンテキストクラス作成
次に、コンテキストクラスを作成します。「Server」フォルダ配下に「AppDbContext.cs」というファイルを作成します。
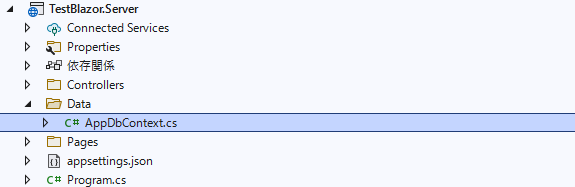
さきほど作成した「Model」を登録しておきます。
using Microsoft.EntityFrameworkCore;
using TestBlazor.Shared.Models;

namespace TestBlazor.Server.Data
{
    public class AppDbContext : DbContext
    {
        public AppDbContext(DbContextOptions options) : base(options)
        {
        }

        public DbSet<T_member> T_member { get; set; }

    }
}
サービス登録
サービスに、コンテキストを登録します。
「Program.cs」に
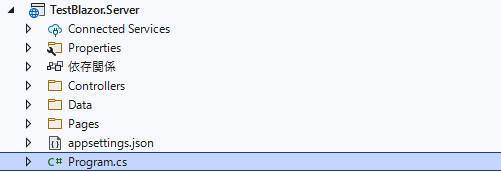
さきほど作成した接続情報「DefaultConnection」を使用して「AppDbContext」を登録します。
using Microsoft.AspNetCore.ResponseCompression;
using TestBlazor.Server.Data;
using Microsoft.EntityFrameworkCore;

var builder = WebApplication.CreateBuilder(args);

// Add services to the container.

builder.Services.AddControllersWithViews();
builder.Services.AddRazorPages();

// 追加
builder.Services.AddDbContext<AppDbContext>(
    options => options.UseSqlServer(
        builder.Configuration.GetConnectionString("DefaultConnection")
        )
    );

var app = builder.Build();

// Configure the HTTP request pipeline.
if (app.Environment.IsDevelopment())
{
    app.UseWebAssemblyDebugging();
}
else
{
    app.UseExceptionHandler("/Error");
    // The default HSTS value is 30 days. You may want to change this for production scenarios, see https://aka.ms/aspnetcore-hsts.
    app.UseHsts();
}

app.UseHttpsRedirection();

app.UseBlazorFrameworkFiles();
app.UseStaticFiles();

app.UseRouting();


app.MapRazorPages();
app.MapControllers();
app.MapFallbackToFile("index.html");

app.Run();
Api作成
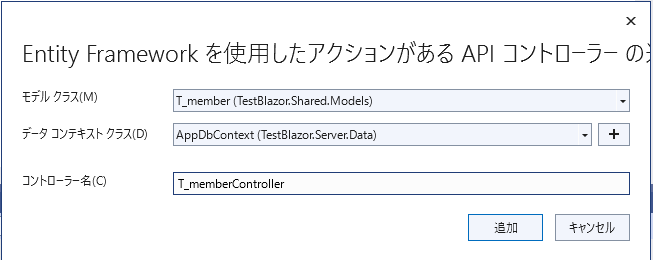
「Controllers」フォルダに「スキャフォールディング」を使用して、Controllerを作成します。
「Controllers」フォルダを右クリックして「新規スキャフォールディングアイテム」をクリックします。
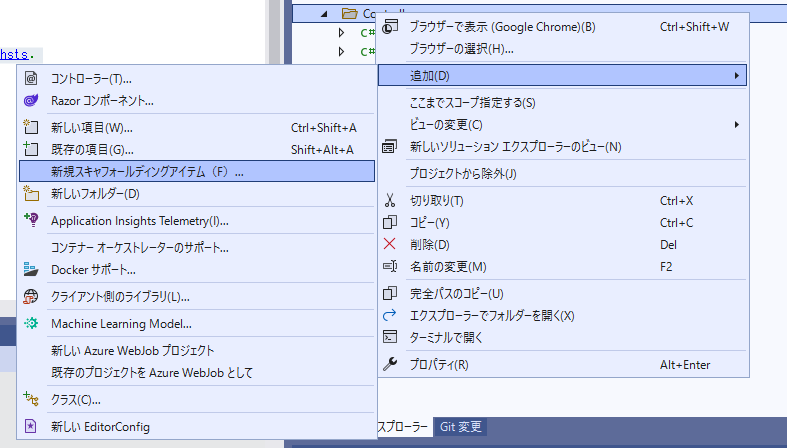
「Entity Frameworkを使用したアクションがある APIコントローラー」を、選択して追加をクリックします。
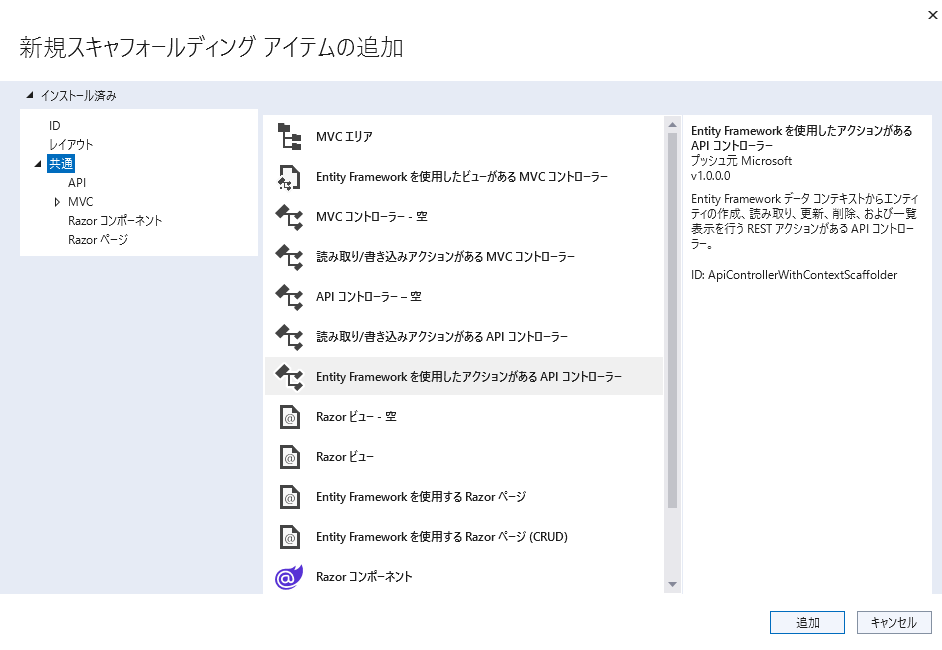
「T_memberController.cs」という名前を入力して「追加」をクリックします。
これでAPIが使用できるようになるので、一度確認してみます。
#nullable disable
using System;
using System.Collections.Generic;
using System.Linq;
using System.Threading.Tasks;
using Microsoft.AspNetCore.Http;
using Microsoft.AspNetCore.Mvc;
using Microsoft.EntityFrameworkCore;
using TestBlazor.Server.Data;
using TestBlazor.Shared.Models;

namespace TestBlazor.Server.Controllers
{
    [Route("api/[controller]")]
    [ApiController]
    public class T_memberController : ControllerBase
    {
        private readonly AppDbContext _context;

        public T_memberController(AppDbContext context)
        {
            _context = context;
        }

        // GET: api/T_member
        [HttpGet]
        public async Task<ActionResult<IEnumerable<T_member>>> GetT_member()
        {
            return await _context.T_member.ToListAsync();
        }

        // GET: api/T_member/5
        [HttpGet("{id}")]
        public async Task<ActionResult<T_member>> GetT_member(long id)
        {
            var t_member = await _context.T_member.FindAsync(id);

            if (t_member == null)
            {
                return NotFound();
            }

            return t_member;
        }

        // PUT: api/T_member/5
        // To protect from overposting attacks, see https://go.microsoft.com/fwlink/?linkid=2123754
        [HttpPut("{id}")]
        public async Task<IActionResult> PutT_member(long id, T_member t_member)
        {
            if (id != t_member.Id)
            {
                return BadRequest();
            }

            _context.Entry(t_member).State = EntityState.Modified;

            try
            {
                await _context.SaveChangesAsync();
            }
            catch (DbUpdateConcurrencyException)
            {
                if (!T_memberExists(id))
                {
                    return NotFound();
                }
                else
                {
                    throw;
                }
            }

            return NoContent();
        }

        // POST: api/T_member
        // To protect from overposting attacks, see https://go.microsoft.com/fwlink/?linkid=2123754
        [HttpPost]
        public async Task<ActionResult<T_member>> PostT_member(T_member t_member)
        {
            _context.T_member.Add(t_member);
            await _context.SaveChangesAsync();

            return CreatedAtAction("GetT_member", new { id = t_member.Id }, t_member);
        }

        // DELETE: api/T_member/5
        [HttpDelete("{id}")]
        public async Task<IActionResult> DeleteT_member(long id)
        {
            var t_member = await _context.T_member.FindAsync(id);
            if (t_member == null)
            {
                return NotFound();
            }

            _context.T_member.Remove(t_member);
            await _context.SaveChangesAsync();

            return NoContent();
        }

        private bool T_memberExists(long id)
        {
            return _context.T_member.Any(e => e.Id == id);
        }
    }
}
API確認
デバックを実行して「api/t_member」にアクセスしてみます。
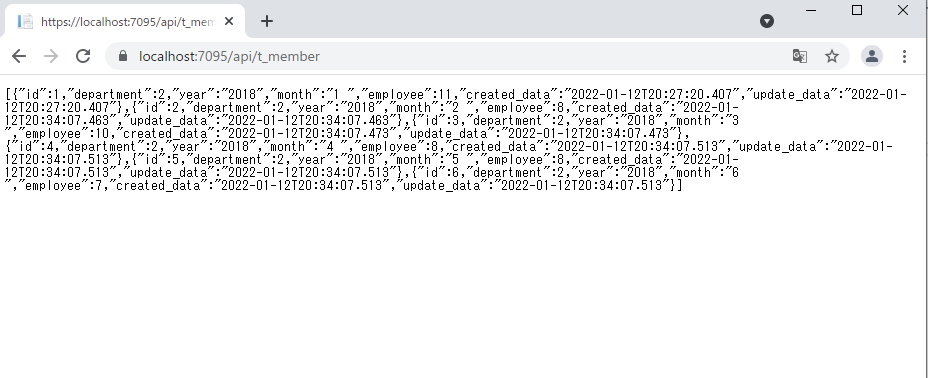
jsonが表示されると思います。
Client側実装
Apiが確認できたので、ここからClient側を構築していきます。
デザインテンプレートに「AntDesign」を使用するのでインストールして、利用できるようにしておきます。
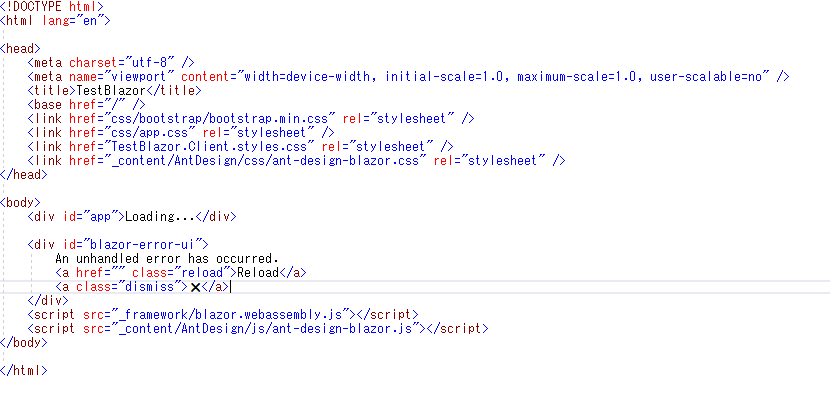
PM> Install-Package -ProjectName TestBlazor.Client -Id AntDesign使用できるように「wwwroot」配下の「index.html」に、CSSとJSを追加します。

以下を追加します。
<link href="_content/AntDesign/css/ant-design-blazor.css" rel="stylesheet" />

<script src="_content/AntDesign/js/ant-design-blazor.js"></script>
ソースコード画像
※ここの「index.html」に記述されている「Loading…」が一番初めに表示されます。
「Shared」ファルダ配下の「_Imports.razor」にも追加します。
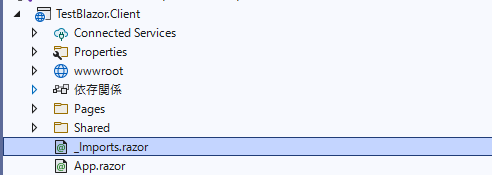
「using AntDesign」を追加します。
@using System.Net.Http
@using System.Net.Http.Json
@using Microsoft.AspNetCore.Components.Forms
@using Microsoft.AspNetCore.Components.Routing
@using Microsoft.AspNetCore.Components.Web
@using Microsoft.AspNetCore.Components.Web.Virtualization
@using Microsoft.AspNetCore.Components.WebAssembly.Http
@using Microsoft.JSInterop
@using TestBlazor.Client
@using TestBlazor.Client.Shared
@using AntDesign
「Program.cs」にも追加して、サービスにも登録します。
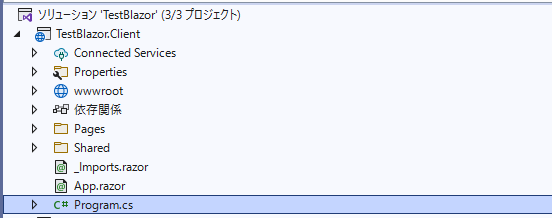
「builder.Services.AddAntDesign()」を追加します。
using Microsoft.AspNetCore.Components.Web;
using Microsoft.AspNetCore.Components.WebAssembly.Hosting;
using TestBlazor.Client;

var builder = WebAssemblyHostBuilder.CreateDefault(args);
builder.RootComponents.Add<App>("#app");
builder.RootComponents.Add<HeadOutlet>("head::after");

builder.Services.AddScoped(sp => new HttpClient { BaseAddress = new Uri(builder.HostEnvironment.BaseAddress) });
builder.Services.AddAntDesign(); //追加

await builder.Build().RunAsync();
コンポーネントも「App.razor」に追加しておきます。
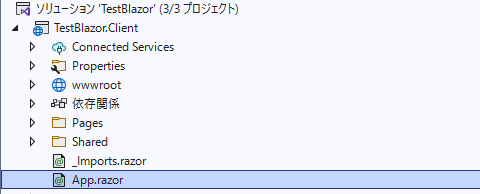
「AntContainer」を追加します。
<Router AppAssembly="@typeof(App).Assembly">
    <Found Context="routeData">
        <RouteView RouteData="@routeData" DefaultLayout="@typeof(MainLayout)" />
        <FocusOnNavigate RouteData="@routeData" Selector="h1" />
    </Found>
    <NotFound>
        <PageTitle>Not found</PageTitle>
        <LayoutView Layout="@typeof(MainLayout)">
            <p role="alert">Sorry, there's nothing at this address.</p>
        </LayoutView>
    </NotFound>
</Router>

<AntContainer />
ページ作成
ページを作成してみます。
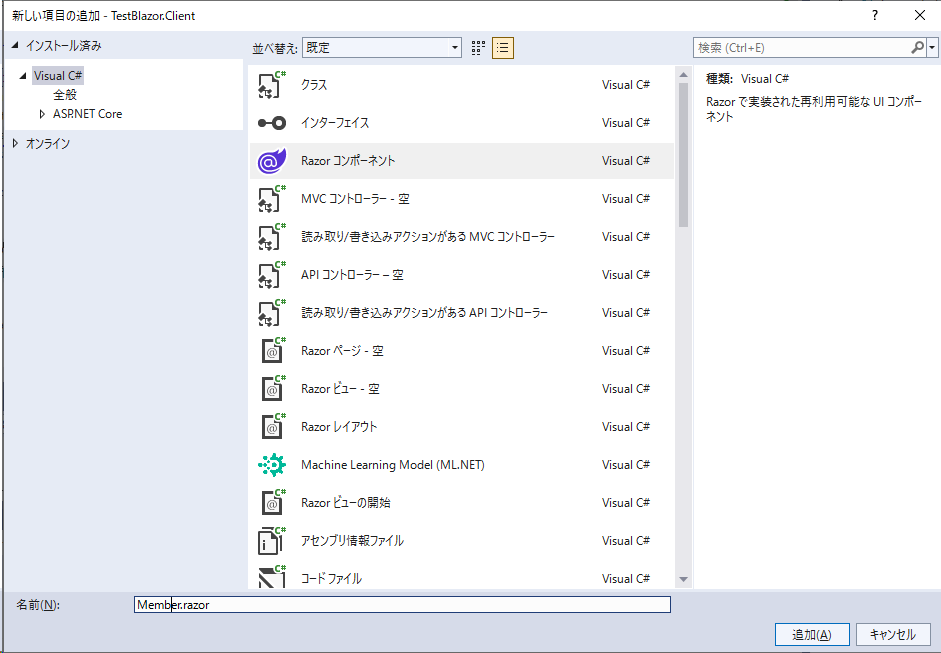
「Pages」を右クリックしてRazorコンポーネントを追加します。
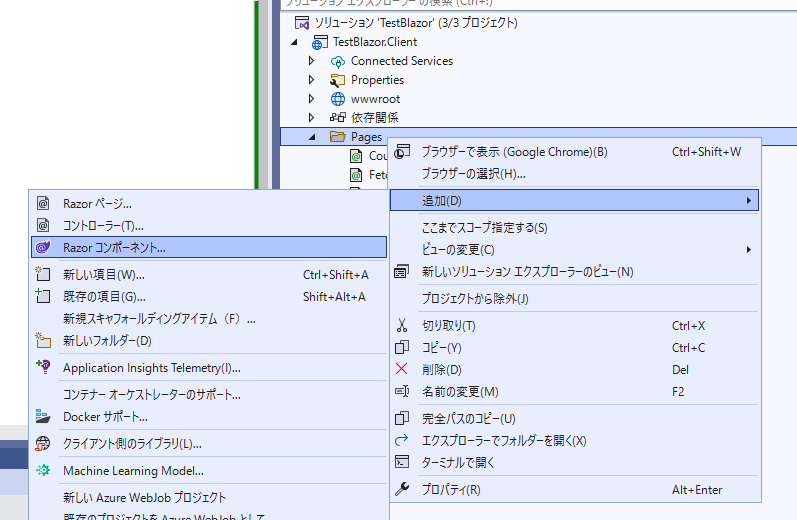
「Member.razor」という名前で作成します。
「AntDesign」のサイトを参考にtableを作成します。
@page "/member"
@using TestBlazor.Shared.Models
@inject HttpClient Http

@if (t_member == null)
{
    <p><em>Loading...</em></p>
}
else
{
    <Table TItem="T_member" DataSource="@t_member">
        <Column @bind-Field="@context.Id" />
        <Column @bind-Field="@context.Department" Sortable />
        <Column @bind-Field="@context.Year" />
        <Column @bind-Field="@context.Month" />
        <Column @bind-Field="@context.Employee" />
        <Column @bind-Field="@context.Created_data" />
        <Column @bind-Field="@context.Update_data" />
    </Table>
}

@code {
    private List<T_member>? t_member;

    protected override async Task OnInitializedAsync()
    {
        t_member = await Http.GetFromJsonAsync<List<T_member>>("api/T_member");
    }
}
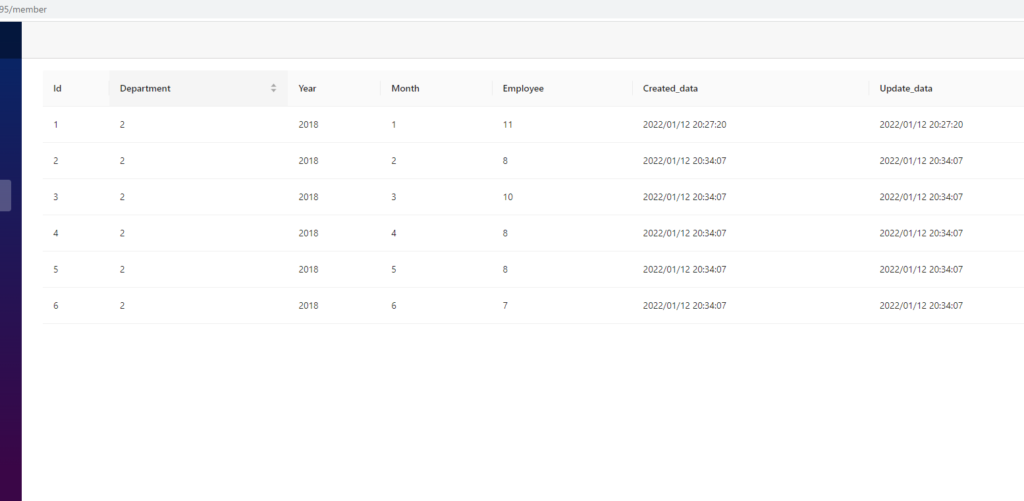
これで「/member」にアクセスすると、以下のテーブルが表示されると思います。
-
前の記事

MySQL jsonデータからkeyを指定してvalueを取得する 2022.01.19
-
次の記事
javascript lodashでメソッドチェーンを任意のタイミングで実行する 2022.01.20