Nuxt.js axiosを使用してAPI接続しJSONデータを取得する
Nuxt.jsでaxiosを使ってAPIデータを取得する手順とサンプルコードです。デザイン部は vuetify を利用しています。
環境
- OS ubuntu19.10
- node v12.13.0
- npm 6.12.1
- Nuxt.js v2.10.2
Nuxt.jsはnuxt-community/starter-templateを利用してインストールしてます。
vue init nuxt-community/starter-template hogeaxiosインストール
axiosをローカルにインストールします
npm i -D @nuxtjs/axiosプロジェクト配下にあるnuxt.config.jsに下記を追加します。
modules: [
    '@nuxtjs/axios'
  ],
  axios: {
  },
これでnuxt.jsでaxiosが利用できます。
vuetifyインストール
UIコンポーネントフレームワークで vuetify もインストールしておきます。
npm install @nuxtjs/vuetifyaxiosと同様に、プロジェクト配下にあるnuxt.config.jsを編集します。
modules: [
    '@nuxtjs/axios',
    '@nuxtjs/vuetify'
  ],
  axios: {
  },
  vuetify: {
    theme: {
      primary: '#3f51b5',
      secondary: '#b0bec5',
      accent: '#8c9eff',
      error: '#b71c1c'
    }
  }
外部IP接続設定
外部IPのブラウザより確認したいので、package.jsonに下記の記述を追加します。
"config": {
    "nuxt": {
      "host": "0.0.0.0",
      "port": "3000"
    }
  },
下記のコマンドを実行してローカルサーバーを起動します。
npm run devサンプルコード作成
pages配下にあるindex.vueを下記のように編集します。
今回APIはこちらの無料のサイトから取得してます。
<template>
  <section class="container">
    <div>
      <v-app id="inspire">
        <v-data-table
          :headers="headers"
          :items="lists"
          :items-per-page="10"
          class="elevation-1"
        >
          <template v-slot:item.title="{ item }">
            <p class="font-weight-medium">{{ item.title }}</p>
          </template>
          <template v-slot:item.id="{ item }">
            <nuxt-link :to="`/users/${item.id}`">
              <v-chip :color="getColor(item.id)" dark>{{ item.id }}</v-chip>
            </nuxt-link>
          </template>
          <template v-slot:item.completed="{ item }">
           {{ getFlg(item.completed) }}
          </template>
        </v-data-table>
      </v-app>
    </div>
  </section>
</template>

<script>
export default {
  data () {
    return {
      headers: [
        {
          text: 'タイトル',
          align: 'left',
          sortable: false,
          value: 'title',
        },
        { text: 'id', value: 'id' },
        { text: '完了フラグ', value: 'completed' },
      ],
    }
  },
  methods: {
    getColor (calories) {
      if (calories % 2 == 0) return 'red'
      return 'green'
    },
    getFlg (flg) {
      if (flg) return '完了'
      else return '未完了'
    },
  },
  async asyncData({ app }) {
    const baseUrl = 'https://jsonplaceholder.typicode.com/todos/';
    const response = await app.$axios.$get(baseUrl);
    return { lists: response };
  }
}
</script>

<style>
.container {
  min-height: 100vh;
  display: flex;
  justify-content: center;
  align-items: center;
  text-align: center;
}

.title {
  font-family: "Quicksand", "Source Sans Pro", -apple-system, BlinkMacSystemFont, "Segoe UI", Roboto, "Helvetica Neue", Arial, sans-serif; /* 1 */
  display: block;
  font-weight: 300;
  font-size: 100px;
  color: #35495e;
  letter-spacing: 1px;
}

.subtitle {
  font-weight: 300;
  font-size: 42px;
  color: #526488;
  word-spacing: 5px;
  padding-bottom: 15px;
}

.links {
  padding-top: 15px;
}
</style>
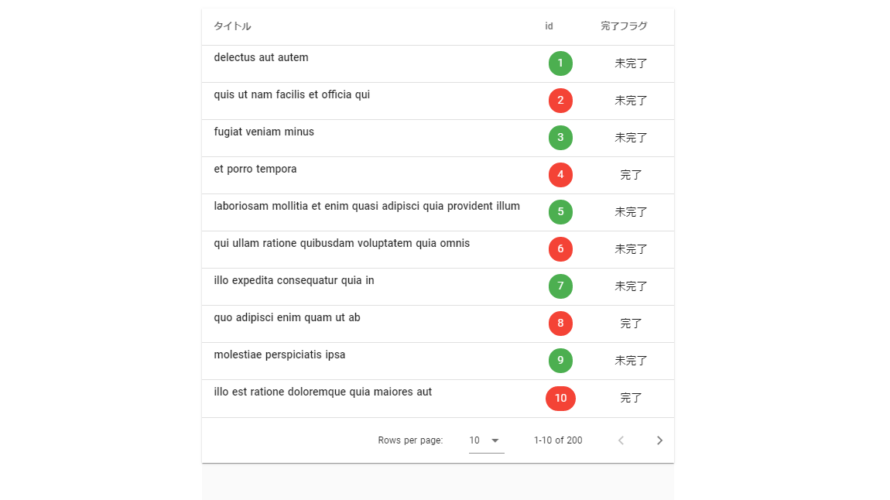
ブラウザから http://プライベートIP:3000にアクセスするとAPIより取得したデータが表示されます。

ソースコード説明
VeutifyのData tableで利用するデータ処理となります。
html
<v-data-table
          :headers="headers"
          :items="lists"
          :items-per-page="10"
          class="elevation-1"
>
JS
data () {
return {
headers: [
{
text: 'タイトル',
align: 'left',
sortable: false,
value: 'title',
},
{ text: 'id', value: 'id' },
{ text: '完了フラグ', value: 'completed' },
],
}
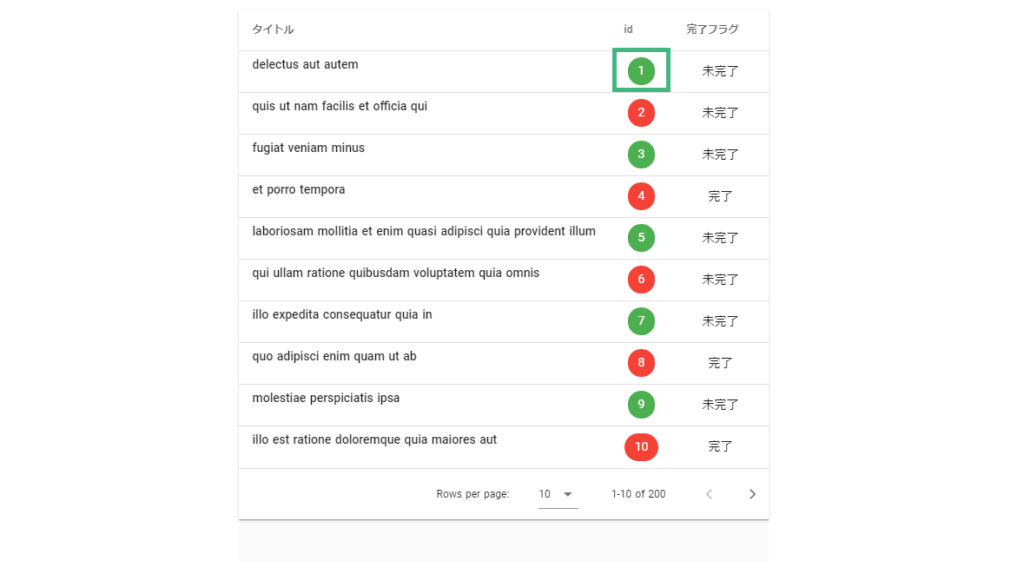
},偶数時は、IDのボタンの色を緑に奇数時は赤に変更し、取得したcompletedがtrueであれば完了という文言をfalseであれば、未完了を返します
html
<template v-slot:item.id="{ item }">
<nuxt-link :to="`/users/${item.id}`">
<v-chip :color="getColor(item.id)" dark>{{ item.id }}</v-chip>
</nuxt-link>
</template>

<template v-slot:item.completed="{ item }">
{{ getFlg(item.completed) }}
</template>
js
methods: {
    getColor (calories) {
      if (calories % 2 == 0) return 'red'
      return 'green'
    },
    getFlg (flg) {
      if (flg) return '完了'
      else return '未完了'
    },
  },
axiosを利用してjsonplaceholderからAPIを取得してます。
asyncDataメソッドは、コンポーネントがローディングされる前に呼ばれます。
async asyncData({ app }) {
    const baseUrl = 'https://jsonplaceholder.typicode.com/todos/';
    const response = await app.$axios.$get(baseUrl);
    return { lists: response };
  }
リンク先 ページ作成
リンク先のページを作成します。
pages配下にusersディレクトリを作成して、_id.vueという名前でファイルを作成し、下記のように編集します。
<template>
<div>
<v-app id="inspire">
<v-card
class="mx-auto"
max-width="450"
>
<v-card-text>
<p class="display-1 text--primary">UserID {{userId}}</p>
<div class="text--primary">
<v-icon>mdi-account</v-icon>{{user.name}}<br>
<v-icon>mdi-alpha</v-icon>{{user.email}}
</div>
</v-card-text>
</v-card>
</v-app>
</div>
</template>
<script>
export default {
data(){
return{
userId: this.$route.params.id
}
},
async asyncData ({route,app}) {
const user = await app.$axios.$get(`https://jsonplaceholder.typicode.com/users/${route.params.id}`)
return{
user
}
}
}
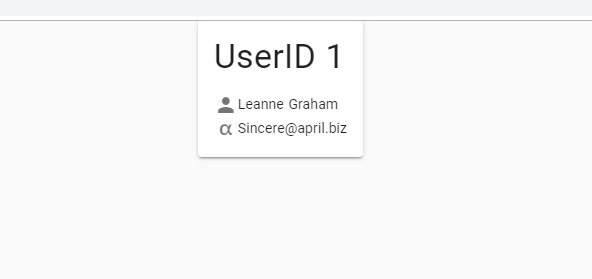
</script>再度、ブラウザから http://プライベートIP:3000 にアクセスしてidをクリックすると
UserIDに紐付いたusernameとemailが表示されます。
-
前の記事

CentOs7 podmanを利用してみる 2019.12.06
-
次の記事

Ubuntu19.10 RubyとRailsをインストールしてサーバーを起動する 2019.12.06