ASP.NET core MVC オプション検索を作成する
- 作成日 2022.02.28
- ASP.NET Core
- ASP.NET Core

ASP.NET core MVCで、オプション検索を作成する手順を記述してます。.NETのバージョンは6を使用してます。
環境
- OS windows10 pro
- IDE Visual Studio 2022
- .NET 6
プロジェクト作成
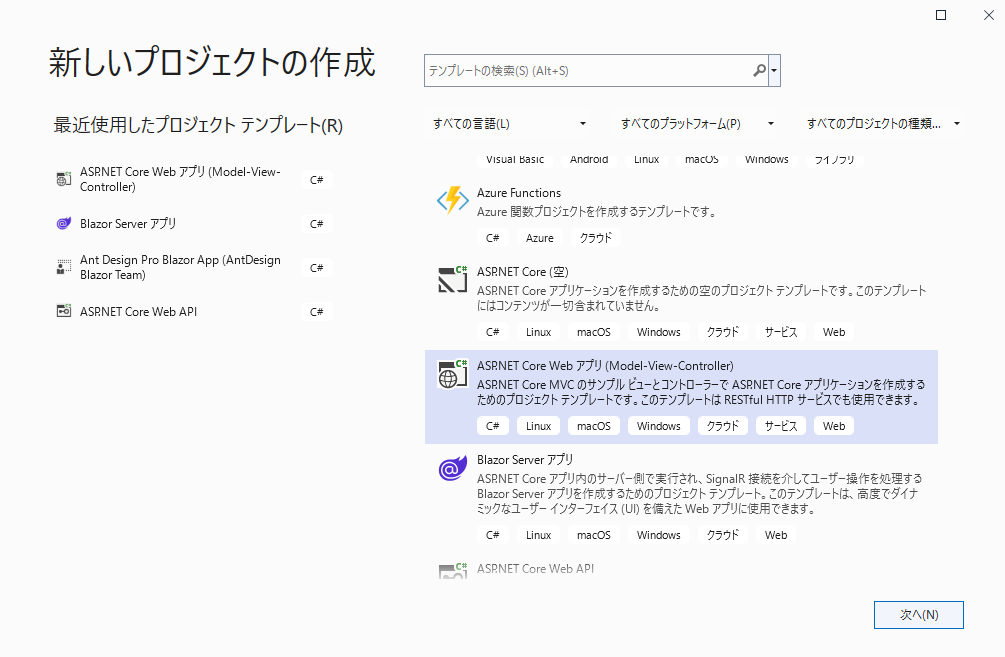
「ASP.NET Core Web アプリ(Model-View-Controller)」を選択して「次へ」をクリックします。
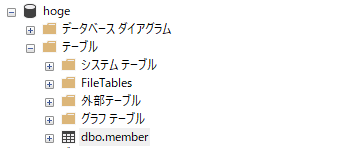
SQLServer
DB「hoge」の「member」テーブルを使用します。
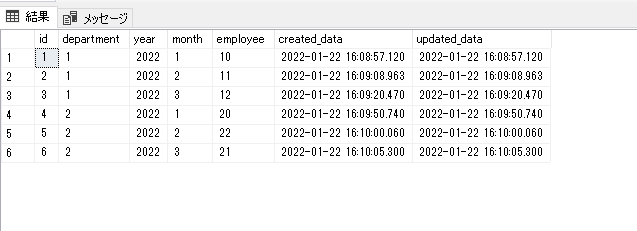
「member」テーブルに、以下のデータを作成してます。
EntityFrameworkCore追加
使用するパッケージを追加しておきます。
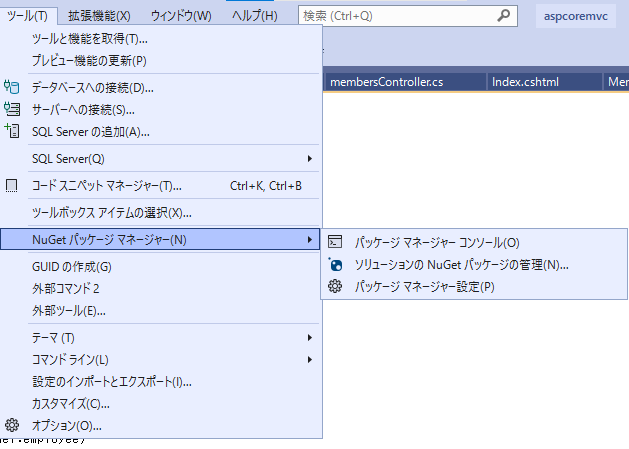
「ツール」 > 「NuGet パッケージ マネージャー」 > 「パッケージ マネージャー コンソール」を選択します。
以下の2つを作成したプロジェクトに追加しておきます。
PM> Install-Package -ProjectName プロジェクト名 -Id Microsoft.EntityFrameworkCore.SqlServer
PM> Install-Package -ProjectName プロジェクト名 -Id Microsoft.EntityFrameworkCore.Tools
Model作成
DBに接続して作成します。Scaffold-DbContextを使用して、以下のコマンドを実行してModelを作成します。
DB名 : hoge
ホスト : 192.168.xxx.xxx
ユーザー : sa
パスワード : password
modelを作成するフォルダ : Models
コンテキスト名 : MemberDbContext
PM> Scaffold-DbContext -Provider Microsoft.EntityFrameworkCore.SqlServer -Connection "Data Source=192.168.xxx.xxx;Database=hoge;user id=sa;password=password" -f -OutputDir "Models" -Context "MemberDbContext" -UseDatabaseNames -DataAnnotations「Models」フォルダ配下に「Model」と「Context」が作成されていることが確認できます。
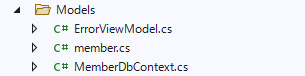
「MemberDbContext.cs」に記述されているDB接続情報は後述の「appsettings.json」で記述するので、コメントアウトしておきます。
//        protected override void OnConfiguring(DbContextOptionsBuilder optionsBuilder)
//        {
//            if (!optionsBuilder.IsConfigured)
//            {
//#warning To protect potentially sensitive information in your connection string, you should move it out of source code. You can avoid scaffolding the connection string by using the Name= syntax to read it from configuration - see https://go.microsoft.com/fwlink/?linkid=2131148. For more guidance on storing connection strings, see http://go.microsoft.com/fwlink/?LinkId=723263.
//                optionsBuilder.UseSqlServer("Data Source=192.168.xxx.xxx;Database=hoge;user id=sa;password=password");
//            }
//        }
DB接続情報
sqlserverと接続できるように接続情報を追加します。
「appsettings.json」に、以下のコードを追加します。

「ConnectionStrings」を追加します。
{
  "Logging": {
    "LogLevel": {
      "Default": "Information",
      "Microsoft.AspNetCore": "Warning"
    }
  },
  "AllowedHosts": "*",
  "ConnectionStrings": {
    "DefaultConnection": "Server=192.168.xxx.xxx;Database=hoge;User ID=sa;Password=password;"
  }
}
サービス登録
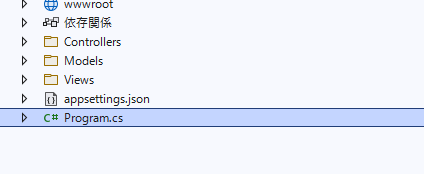
サービスに、コンテキストを登録します。「Program.cs」を編集します。
さきほど「appsettings.json」に作成した接続情報「DefaultConnection」を使用して「MemberDbContext」を登録します。
var builder = WebApplication.CreateBuilder(args);

// Add services to the container.
builder.Services.AddControllersWithViews();

// 追加
builder.Services.AddDbContext<MemberDbContext>(
    options => options.UseSqlServer(
        builder.Configuration.GetConnectionString("DefaultConnection")
        )
    );
スキャフォールド
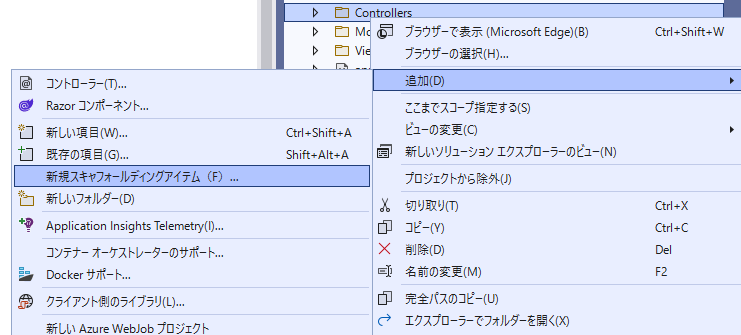
ここではスキャフォールドを使用して、ViewとControllersを作成してCRUDを作成します。
「Controllers」フォルダを右クリックして「新規スキャフォールディングアイテム」をクリックします。
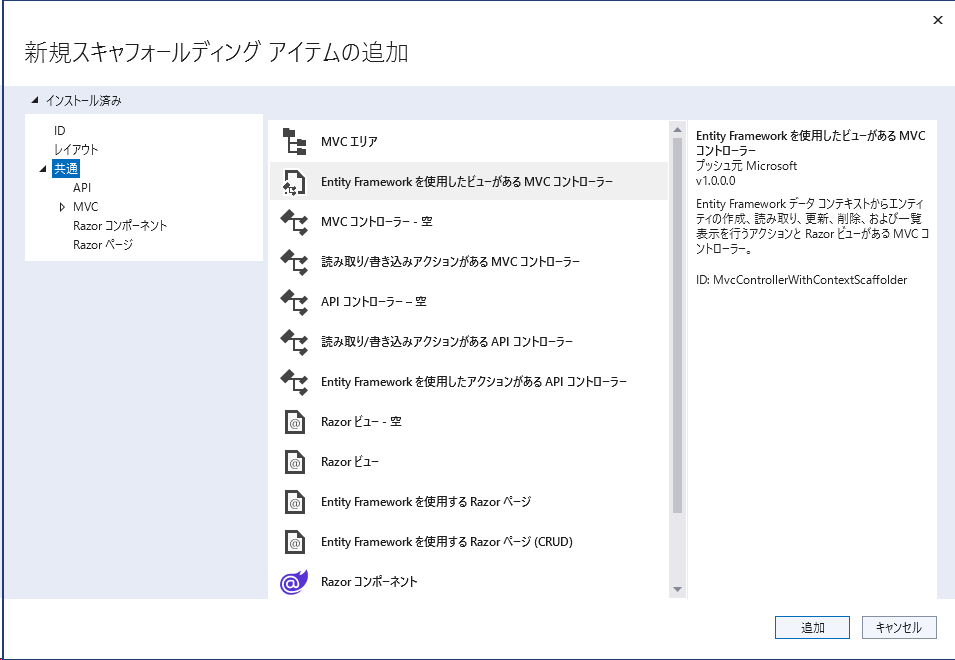
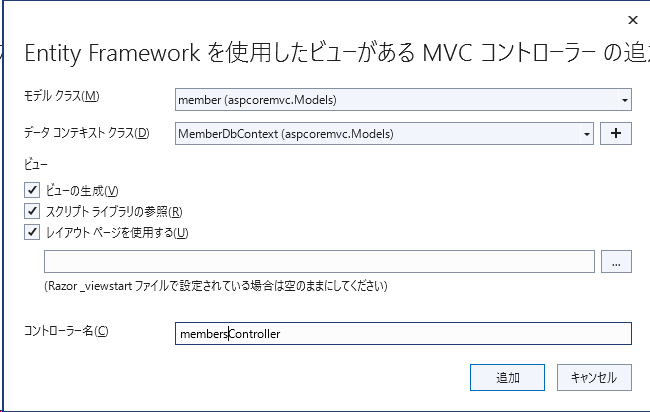
「Entity Frameworkを使用したビューがあるMVCコントローラー」を選択して、「追加」をクリックします。
さきほど、作成したモデルとデータコンテキストを選択して、「追加」をクリックします。
実行
一旦、「F5」キーでデバックを実行して、起動します。
http://localhost:ポート番号/members/ にアクセスするとCRUDが作成されていることが確認できます。
オプション機能追加
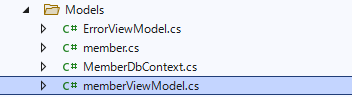
「memberViewModel.cs」というモデルを作成します。
以下のコードを記述します。
using System;
using System.Collections.Generic;
using System.ComponentModel.DataAnnotations;
using System.ComponentModel.DataAnnotations.Schema;
using Microsoft.AspNetCore.Mvc.Rendering;
using Microsoft.EntityFrameworkCore;
namespace aspcoremvc.Models
{
public partial class memberViewModel
{
public List<member> member { get; set; }
public int id { get; set; }
public int department { get; set; }
public string year { get; set; } = null!;
public SelectList month { get; set; }
public int employee { get; set; }
public DateTime created_data { get; set; }
public DateTime updated_data { get; set; }
public string memberSerch { get; set; }
}
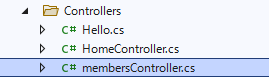
}「Controllers」フォルダ配下に作成された「membersController.cs」を編集します。
Indexメソッドを以下のコードに編集して、オプションの結果により結果を変更します。
public async Task<IActionResult> Index(string memberSerch,string strSearch)
{
// 全てのmonth取得
IQueryable<string> all = from m in _context.members
orderby m.month
select m.month;
// 全データ取得
var member = from m in _context.members
select m;
// オプション設定時の処理
if (!string.IsNullOrEmpty(memberSerch))
{
member = member.Where(x => x.month == memberSerch);
}
// 各プロパティを作成
var memberList = new memberViewModel
{
month = new SelectList(await all.Distinct().ToListAsync()),
member = await member.ToListAsync()
};
return View(memberList);
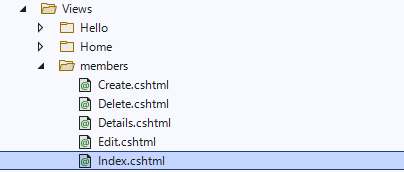
}次に「Views > members」フォルダ配下にある「Index.cshtml」も編集してselectを追加しておきます。
追加します。
@model aspcoremvc.Models.memberViewModel

@{
    ViewData["Title"] = "Index";
}

<h1>Index</h1>

<p>
    <a asp-action="Create">Create New</a>
</p>
<form asp-controller="members" asp-action="Index" method="get">
    <div class="row">
        <div class="col">
            <select class="form-select" asp-for="memberSerch" asp-items="Model.month">
                <option value="">全て</option>
            </select>
        </div>
        <div class="col">
            <input class="btn btn-primary" type="submit" value="検索" />
        </div>
    </div>
</form>
<table class="table">
    <thead>
        <tr>
            <th>
                @Html.DisplayNameFor(model => model.department)
            </th>
            <th>
                @Html.DisplayNameFor(model => model.year)
            </th>
            <th>
                @Html.DisplayNameFor(model => model.month)
            </th>
            <th>
                @Html.DisplayNameFor(model => model.employee)
            </th>
            <th>
                @Html.DisplayNameFor(model => model.created_data)
            </th>
            <th>
                @Html.DisplayNameFor(model => model.updated_data)
            </th>
            <th></th>
        </tr>
    </thead>
    <tbody>
@foreach (var item in Model.member) {
        <tr>
            <td>
                @Html.DisplayFor(modelItem => item.department)
            </td>
            <td>
                @Html.DisplayFor(modelItem => item.year)
            </td>
            <td>
                @Html.DisplayFor(modelItem => item.month)
            </td>
            <td>
                @Html.DisplayFor(modelItem => item.employee)
            </td>
            <td>
                @Html.DisplayFor(modelItem => item.created_data)
            </td>
            <td>
                @Html.DisplayFor(modelItem => item.updated_data)
            </td>
            <td>
                <a asp-action="Edit" asp-route-id="@item.id">Edit</a> |
                <a asp-action="Details" asp-route-id="@item.id">Details</a> |
                <a asp-action="Delete" asp-route-id="@item.id">Delete</a>
            </td>
        </tr>
}
    </tbody>
</table>
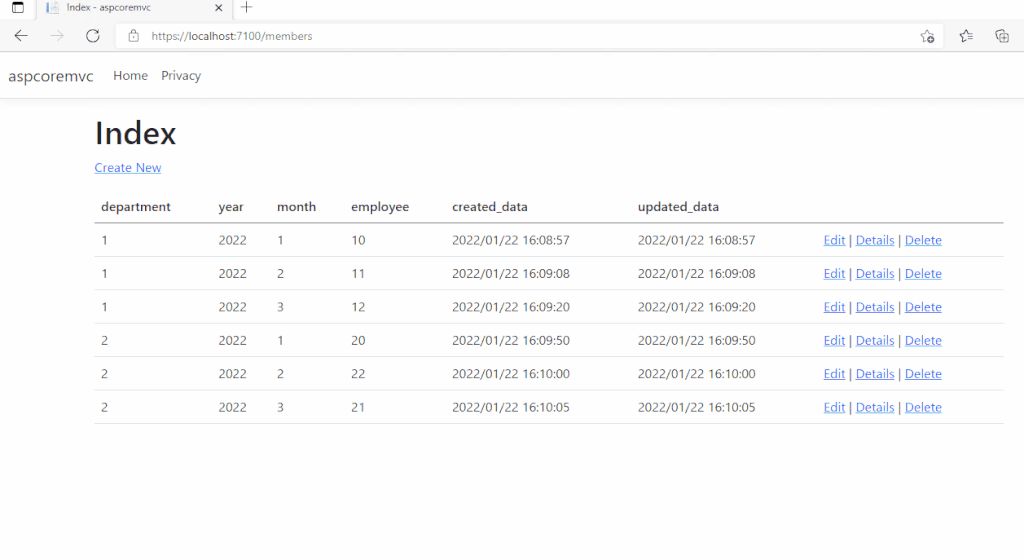
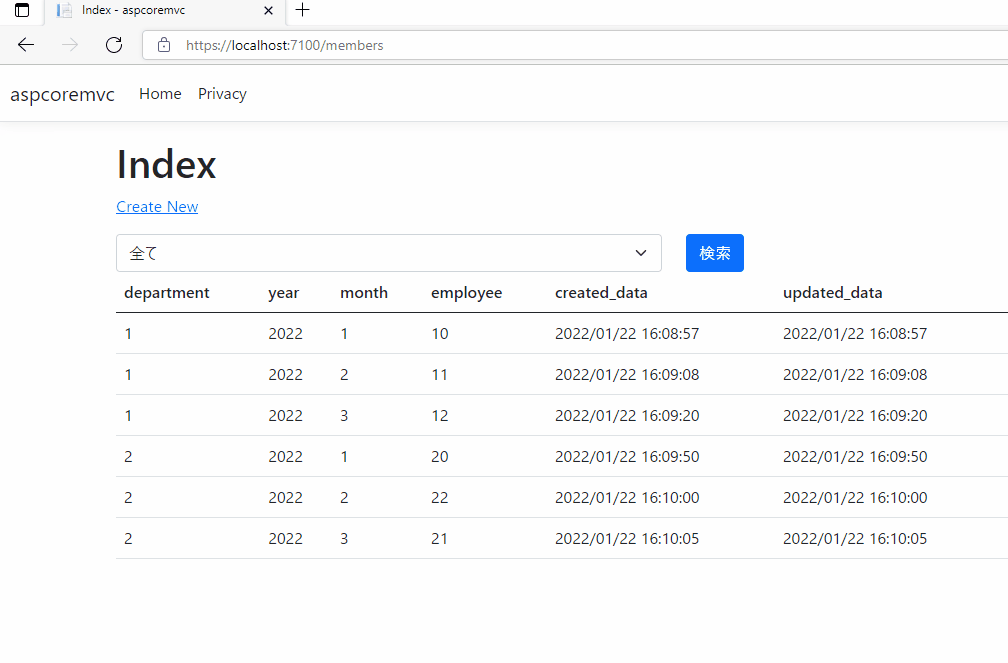
「F5」キーでデバックを実行して、起動して「http://localhost:ポート番号/members/」にアクセスします。
selectボックスで指定した値で、検索した結果が表示されていることが確認できます。
-
前の記事

cron 設定時にエラー「ERROR (getpwnam() failed – user unknown)」が発生した場合の対処法 2022.02.28
-
次の記事

jquery display noneを指定した要素を表示する 2022.02.28