Nuxt.js vue-org-treeを使用して組織図を実装する
- 作成日 2020.02.21
- nuxt.js
- nuxt.js, vue-org-tree, 使い方
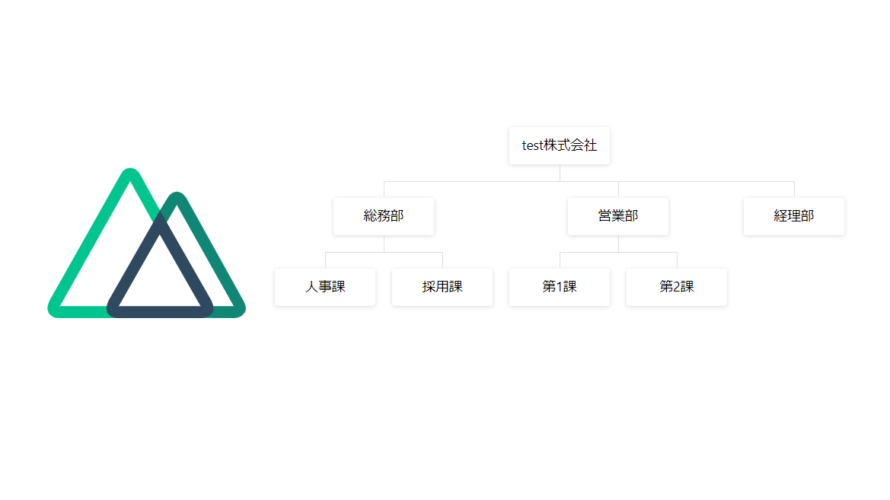
ライブラリ「vue-org-tree」をインストールすると、組織図のレイアウトを実装でき更新も簡単に行うことができます。ここでは、nuxt.jsで vue-org-treeを利用するための手順と簡単な使い方を記述してます。
環境
- OS ubuntu19.10
- node v12.13.0
- npm 6.13.7
- Nuxt.js v2.11.0
Nuxt.js環境構築
下記のコマンドで構築。ここでは、nuxtappという名前でプロジェクトを作成してます。
npx create-nuxt-app nuxtapp下記の設定で構築してます。
✨  Generating Nuxt.js project in nuxtapp
? Project name nuxtapp
? Project description My laudable Nuxt.js project
? Author name taro
? Choose the package manager Yarn
? Choose UI framework None
? Choose custom server framework None (Recommended)
? Choose Nuxt.js modules (Press <space> to select, <a> to toggle all, <i> to invert selection)
? Choose linting tools ESLint
? Choose test framework None
? Choose rendering mode Universal (SSR)
? Choose development tools (Press <space> to select, <a> to toggle all, <i> to invert selection)
yarn run v1.19.1
外部IP許可
localhostではなくプライベートIPを利用して接続して確認したいので、作成したプロジェクト配下にあるpackage.jsonに下記を追加します。
"config": {
  "nuxt": {
    "host": "0.0.0.0",
    "port": "3000"
  }
},
vue-org-treeインストール
下記のコマンドでインストールします。
## 作成したプロジェクトに移動
cd nuxtapp

## インストール
yarn add vue-org-tree

## lessもインストールしないとエラーになるためインストール
yarn add less-loader less
vue-org-tree使い方
plugins配下にplugin.jsを作成し、下記の通りに編集します。
import Vue from 'vue'
import Vue2OrgTree from 'vue2-org-tree'
Vue.component('vue2-org-tree', Vue2OrgTree)
プロジェクト配下にあるnuxt.config.jsに下記のコードを追加します。
plugins: [
    {
      src: '@/plugins/plugin',
      mode: 'client'
    }
  ],
pages配下にあるindex.vueを下記の通りに編集します。
<template>
  <div class="container">
    <div>
      <logo />
      <vue2-org-tree
        :data="tree"
        :label-width="120"
        :label-class-name="labelClass"
        :render-content="renderContent"
        @on-node-click="onNodeClick"
        @on-node-mouseover="onNodeMouseOver"
        @on-node-mouseout="onNodeMouseOut"
      />
    </div>
  </div>
</template>

<script>
import Logo from '~/components/Logo.vue'

export default {
  name: 'Nuxttest',
  components: {
    Logo
  },
  data () {
    return {
      tree: {
        label: 'test株式会社',
        children: [{
          label: '総務部',
          children: [{ label: '人事課' }, { label: '採用課' }]
        }, {
          label: '営業部',
          children: [{ label: '第1課' }, { label: '第2課' }]
        }, {
          label: '経理部'
        }]
      }
    }
  },
  methods: {
    labelClass (data) {
      return 'bg_node'
    },
    renderContent (h, data) {
      return data.label
    },
    onNodeClick (e, data) {

    },
    onNodeMouseOver (e, data) {

    },
    onNodeMouseOut (e, data) {

    }
  }
}
</script>
<style>
.container {
  margin: 0 auto;
  min-height: 100vh;
  display: flex;
  justify-content: center;
  align-items: center;
  text-align: center;
}
</style>
起動します
yarn devブラウザから http://プライベートIP:3000にアクセスすると、 組織図が作成されていることが確認できます。
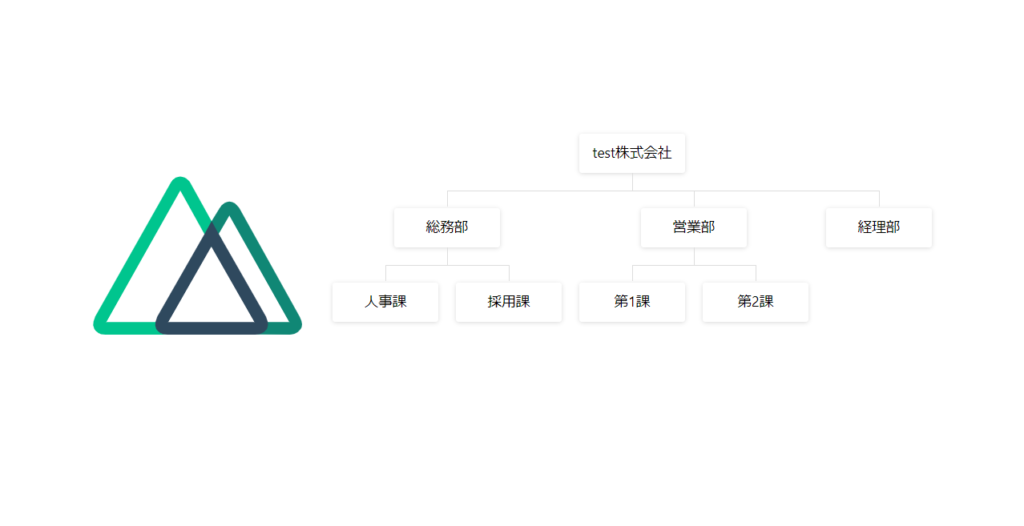
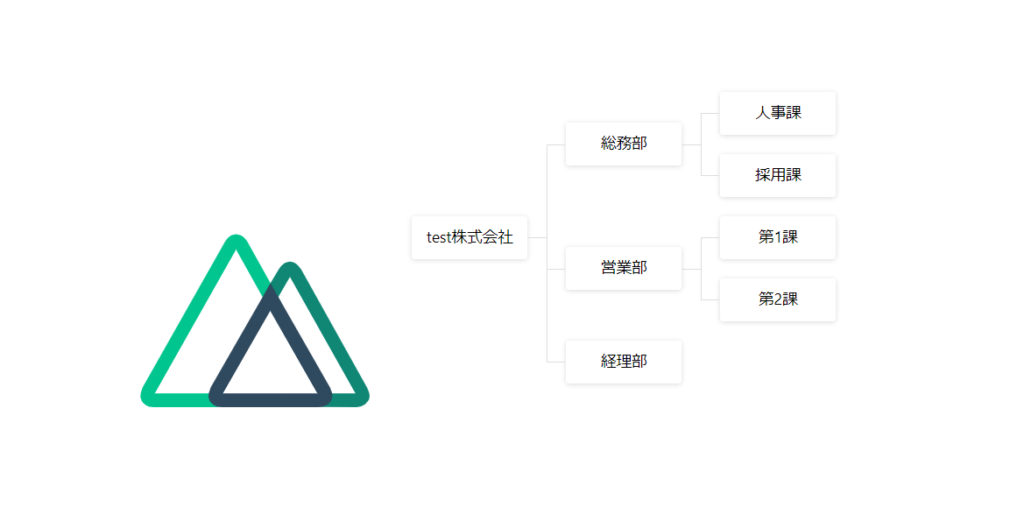
横向きにする場合は、
:horizontal="true"と指定すれば横向きになります。
-
前の記事
Vue.js ライブラリ「vue-chartless」を利用して円グラフと棒グラフを作成する 2020.02.21
-
次の記事

Node.js lodashの利用方法と使い方 2020.02.22






コメントを書く