Fakerとjson-serverをインストールしてダミーのjsonデータをapiで取得する
- 作成日 2020.12.10
- JSON Server
- JSON Server
jsonのダミーデータが簡単に作成できるFakerと、REST APIが簡単に構築できるjson-serverをインストールしてダミーのjsonデータをapiで取得する手順を記述してます。
環境
- OS CentOS Linux release 8.0.1905 (Core)
- node V12.16.3
- npm 6.14.7
Fakerとjson-serverインストール
npmでインストールします。
npm i json-server fakerダミーデータ作成
test.jsという名前で、以下のコードでダミーデータを作成してみます。
const faker = require("faker")

let db = {
  users: []
}

for(let i = 0; i < 10; ++i) {
  db.users.push({
    id: i, //id
    name: faker.name.findName(), //名前
    email: faker.internet.email() //メールアドレス
  })
}

// 結果確認
console.log(JSON.stringify(db))
実行します。
node test.js

<出力結果>
{"users":[{"id":0,"name":"Heather Satterfield","email":"Tianna_Okuneva@hotmail.com"},{"id":1,"name":"Carlos Mueller","email":"Alize45@yahoo.com"},{"id":2,"name":"Angelina Schaden","email":"Emmett.Okuneva57@gmail.com"},{"id":3,"name":"Paula Bergstrom","email":"Quinn39@yahoo.com"},{"id":4,"name":"Clayton Moen","email":"Norbert_Roob@hotmail.com"},{"id":5,"name":"Ricardo Swaniawski","email":"Devyn48@hotmail.com"},{"id":6,"name":"Daryl Hettinger DDS","email":"Rickie.Terry26@hotmail.com"},{"id":7,"name":"Olivia D'Amore","email":"Nicholaus.Jaskolski5@hotmail.com"},{"id":8,"name":"Kelvin Koss","email":"Geovanny14@hotmail.com"},{"id":9,"name":"Charles O'Reilly","email":"Justine19@hotmail.com"}]}
別ファイルに書き出します。
node test.js > human.jsonこの書き出したjsonファイルを使用して、json-serverを使用して、
REST APIサーバーを作成してみます。
サーバー起動
ここでは、外部からアクセスできるようにホストを指定してます。
npx json-server --watch human.json --host 192.168.xxx.xxx --port 3001

<出力結果>
 \{^_^}/ hi!

  Loading human.json
  Done

  Resources
  http://192.168.xxx.xxx:3001/users

  Home
  http://192.168.xxx.xxx:3001

  Type s + enter at any time to create a snapshot of the database
  Watching...
※ここでは環境がcentos8なので、firewallも設定しておきます。
sudo firewall-cmd --add-port=3001/tcp --zone=public --permanent
sudo firewall-cmd --reload
ブラウザから http://プライベートIP or サーバーアドレス:3001 にアクセスします。
サーバーが起動していることが確認できます。
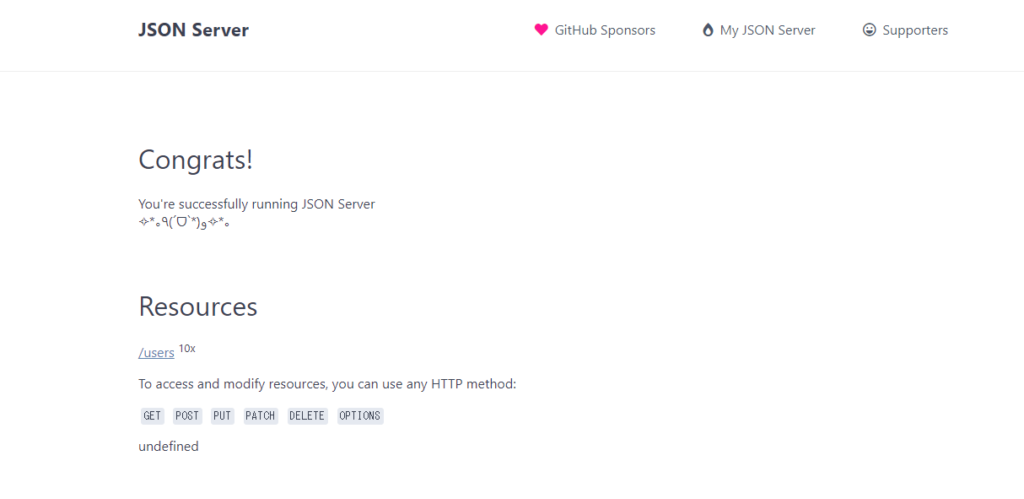
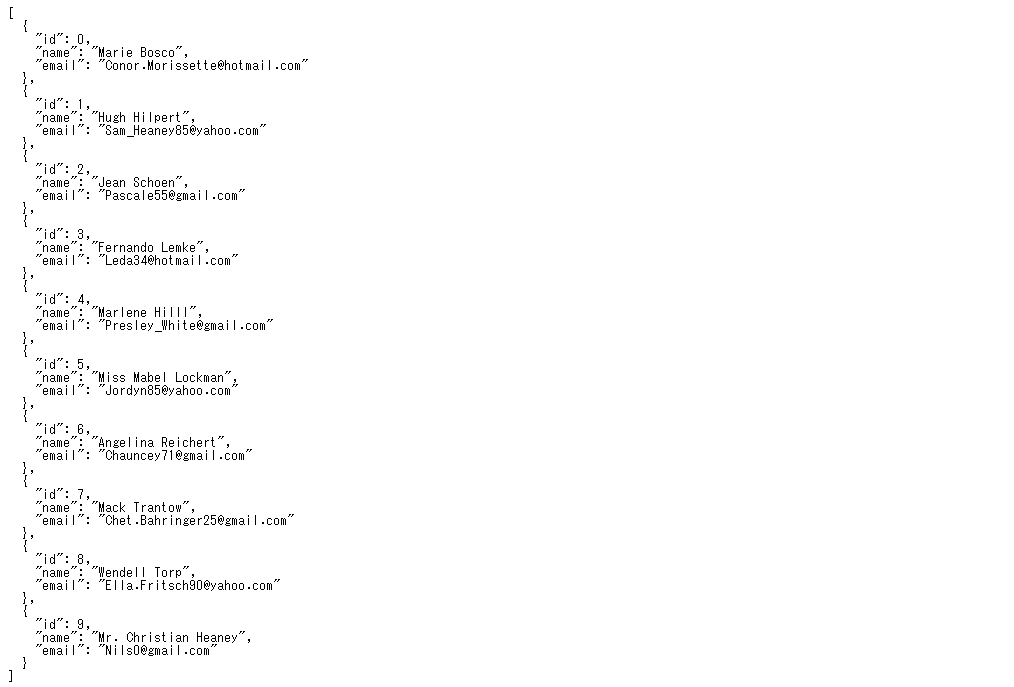
http://プライベートIP or サーバーアドレス:3001/usersにアクセスすると、jsonが表示されていることが確認できます
JSON取得
javascriptでaxiosを使用して、作成したjsonを取得してみます。
<!DOCTYPE html>
<html lang="ja">
<head>
<meta charset="utf-8">
<title>mebeeサンプル</title>
<link rel="stylesheet" href="https://fonts.googleapis.com/css?family=Roboto:300,400,500,700|Material+Icons">
<link rel="stylesheet" href="https://stackpath.bootstrapcdn.com/bootstrap/5.0.0-alpha1/css/bootstrap.min.css">
<script src="https://unpkg.com/axios/dist/axios.min.js"></script>
</head>
<style>
.main {
margin: 0 auto;
margin-top: 200px;
display: flex;
flex-direction: column;
align-items: center;
font-size: 30px;
}
</style>
<script>
function hoge() {
jsoncount();
}
async function jsoncount() {
try {
const res = await axios.get('http://192.168.101.220:3001/users');
// 内容表示用
const items = JSON.parse(JSON.stringify(res.data));
//数を表示
result.innerHTML = 'jsonデータの数は' + Object.keys(items).length;
disp(items,"txt");
} catch (err) {
console.error(err);
}
}
//フロントに表示する関数
function disp(obj, id) {
let text = [];
// for ofを使用
for (let item of obj) {
text.push('<li class="list-group-item">'
+ '<span class="badge bg-danger">id</span>' + item.id
+ '<span class="badge bg-danger">name</span>' + item.name
+ '<span class="badge bg-danger">email</span>' + item.email + '</li>');
}
//innerHTMLを使用して表示
document.getElementById(id).innerHTML = text.join('');
}
window.onload = () => {
// クリックイベントを登録
btn.onclick = () => { hoge(); }; // document.getElementById('btn');を省略
}
</script>
<body>
<div class="main container">
<h2><span id="result" class="badge bg-primary">表示</span></h2>
<ul id="txt" class="list-group list-group-flush"></ul>
<div class="row">
<button id="btn" type="button" class="btn btn-warning">
実行
</button>
</div>
</div>
</body>
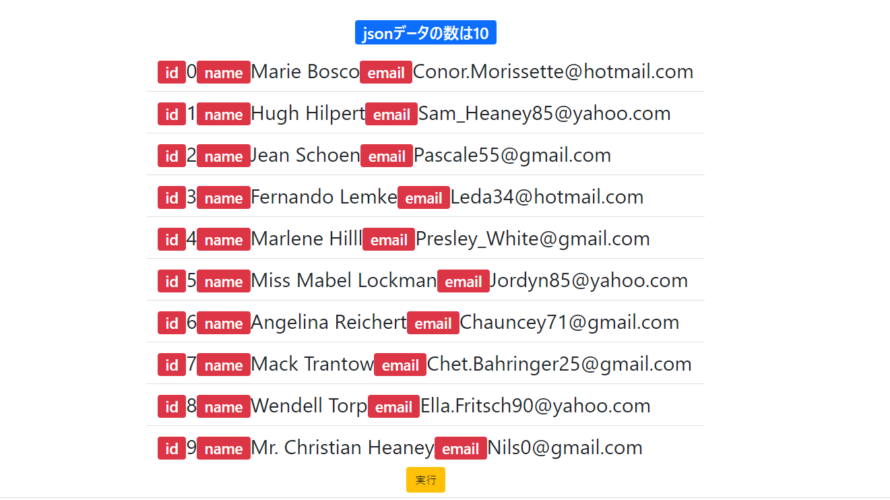
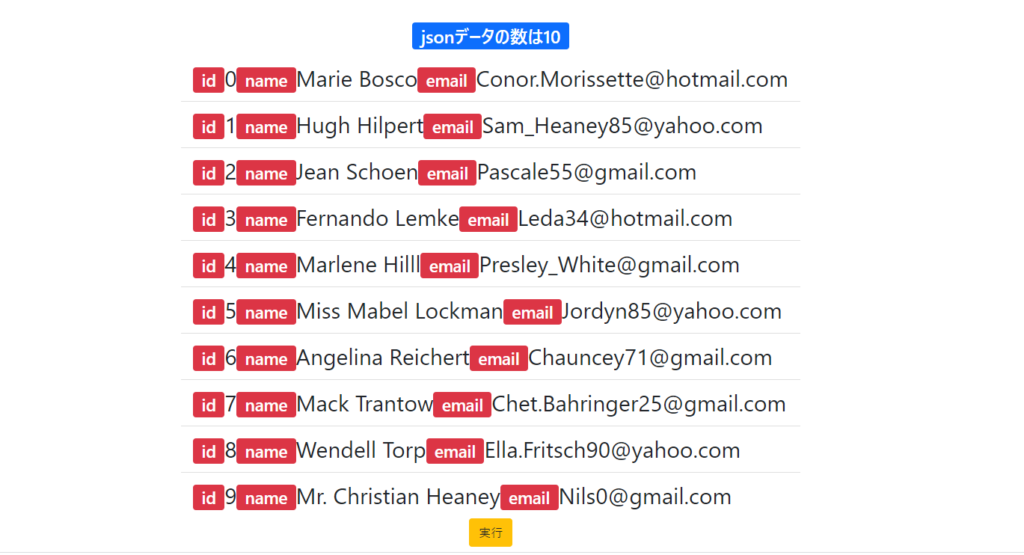
</html>「実行」ボタンをクリックすると、jsonが取得されて表示されることが確認できます。
-
前の記事

Trisquelにapache2をインストールする 2020.12.10
-
次の記事

php ordで文字列のASCIIコード値を取得する 2020.12.10