CentOs9 Elasticsearchをインストールする

CentOs9に、大量データを高速に検索できるオープソースの全文検索エンジン「elasticsearch」のインストール手順を記述してます。「rpm」を使用してインストールしてます。Elasticsearch8からパスワードが必要になっています。
環境
- OS CentOS Stream release 9
- Elasticsearch 8.1.2
Javaインストール
Elasticsearchはjavaのアプリケーションなので、javaがインストールされている必要があります。
$ java -version

openjdk version "11.0.16" 2022-07-19 LTS
OpenJDK Runtime Environment (Red_Hat-11.0.16.0.8-2.el9) (build 11.0.16+8-LTS)
OpenJDK 64-Bit Server VM (Red_Hat-11.0.16.0.8-2.el9) (build 11.0.16+8-LTS, mixed mode, sharing)
インストールされてなければインストールしておきます。
$ sudo dnf install java-11-openjdkElasticsearchインストール
「rpm」からインストールします。
※最新版はこちらで確認できます。
ここでは「8.1.2」が最新だったのでこちらをダウンロードします。
※後で変更できますが、途中でパスワードが表示されます。
$ wget https://artifacts.elastic.co/downloads/elasticsearch/elasticsearch-8.1.2-x86_64.rpm

$ wget https://artifacts.elastic.co/downloads/elasticsearch/elasticsearch-8.1.2-x86_64.rpm.sha512

$ shasum -a 512 -c elasticsearch-8.1.2-x86_64.rpm.sha512

$ sudo rpm --install elasticsearch-8.1.2-x86_64.rpm

--------------------------- Security autoconfiguration information ------------------------------

Authentication and authorization are enabled.
TLS for the transport and HTTP layers is enabled and configured.

The generated password for the elastic built-in superuser is : xxxxxxxxxxxxx

If this node should join an existing cluster, you can reconfigure this with
'/usr/share/elasticsearch/bin/elasticsearch-reconfigure-node --enrollment-token <token-here>'
after creating an enrollment token on your existing cluster.

You can complete the following actions at any time:

Reset the password of the elastic built-in superuser with
'/usr/share/elasticsearch/bin/elasticsearch-reset-password -u elastic'.

Generate an enrollment token for Kibana instances with
 '/usr/share/elasticsearch/bin/elasticsearch-create-enrollment-token -s kibana'.

Generate an enrollment token for Elasticsearch nodes with
'/usr/share/elasticsearch/bin/elasticsearch-create-enrollment-token -s node'.

-------------------------------------------------------------------------------------------------
起動します。
※自動起動も設定する場合は「enable」を使用します。
$ sudo systemctl start elasticsearch

$ sudo systemctl enable elasticsearch
「status」は以下で確認できます。
$ sudo systemctl status elasticsearch
● elasticsearch.service - Elasticsearch
     Loaded: loaded (/usr/lib/systemd/system/elasticsearch.service; disabled; vendor preset: disabled)
     Active: active (running) since Wed 2022-10-26 08:37:42 UTC; 1h 23min ago
       Docs: https://www.elastic.co
   Main PID: 4080 (java)
      Tasks: 67 (limit: 12328)
     Memory: 1.3G
        CPU: 3min 194ms
     CGroup: /system.slice/elasticsearch.service
             tq4080 /usr/share/elasticsearch/jdk/bin/java -Xshare:auto -Des.networkaddress.cache.ttl=60 -Des.networka>
             mq4352 /usr/share/elasticsearch/modules/x-pack-ml/platform/linux-x86_64/bin/controller

Oct 26 08:36:35 centos systemd[1]: Starting Elasticsearch...
Oct 26 08:37:42 centos systemd[1]: Started Elasticsearch.
動作確認します。ここでインストール時に表示された「パスワード」を「Enter host password for user ‘elastic’」で使用します。
$ sudo curl --cacert /etc/elasticsearch/certs/http_ca.crt -u elastic https://localhost:9200

<出力結果>
Enter host password for user 'elastic':
{
  "name" : "centos",
  "cluster_name" : "elasticsearch",
  "cluster_uuid" : "VUji6t9NTdeAX9bUVTeidw",
  "version" : {
    "number" : "8.1.2",
    "build_flavor" : "default",
    "build_type" : "rpm",
    "build_hash" : "31df9689e80bad366ac20176aa7f2371ea5eb4c1",
    "build_date" : "2022-03-29T21:18:59.991429448Z",
    "build_snapshot" : false,
    "lucene_version" : "9.0.0",
    "minimum_wire_compatibility_version" : "7.17.0",
    "minimum_index_compatibility_version" : "7.0.0"
  },
  "tagline" : "You Know, for Search"
}
パスワードは、以下でリセット可能です。
$ sudo /usr/share/elasticsearch/bin/elasticsearch-reset-password -u elastic
This tool will reset the password of the [elastic] user to an autogenerated value.
The password will be printed in the console.
Please confirm that you would like to continue [y/N]y


Password for the [elastic] user successfully reset.
New value: xxxxxxxxxxxxxxxxxxxxx
設定ファイル
設定ファイル「/etc/elasticsearch/」配下の「elasticsearch.yml」です。
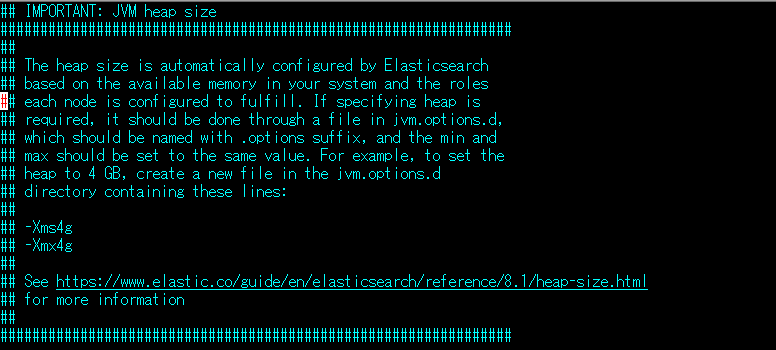
$ sudo vim /etc/elasticsearch/elasticsearch.ymlメモリの割当は「jvm.options」で可能です。
$ sudo vim /etc/elasticsearch/jvm.options「-Xms」と「-Xmx」を編集します。
※256Mにするには「-Xms256m」と「-Xmx256m」にします。
-
前の記事

javascript set同士が等しいかを判定する 2022.10.28
-
次の記事
Android Studio デバックを行うショートカットキー 2022.10.28