Rocky Linux apacheをインストールして起動する
- 作成日 2021.06.23
- 更新日 2022.09.02
- apache Rocky Linux
- apache, Rocky Linux

Rocky LinuxにWEBサーバーであるApache httpd をインストールするまでの手順を記述してます。
環境
- OS Rocky Linux8.3
インストール
dnfで、httpd をインストールします。
sudo dnf -y install httpdバージョンを確認してみます。
httpd -v

<出力結果>
Server version: Apache/2.4.37 ()
Server built:   Apr 27 2021 02:07:09
apache起動
インストールが終わったので、起動します。
sudo systemctl start httpd自動起動は、enableを実行します。
sudo systemctl enable httpd–now オプションをつけると「 enable (自動起動)」と「 start (起動)」を同時にできます。
sudo systemctl enable --now httpd停止は、stopで可能です。
sudo systemctl stop httpd状態は、statusで確認することが可能です。
systemctl status httpdfirewall設定
外部から接続できるように80ポートを許可しておきます。
sudo firewall-cmd --add-port=80/tcp --zone=public --permanent再起動して、反映させます。
sudo firewall-cmd --reload動作確認
http://プライベートIP or localhost:80にアクセスすると、以下の画面が表示されます。
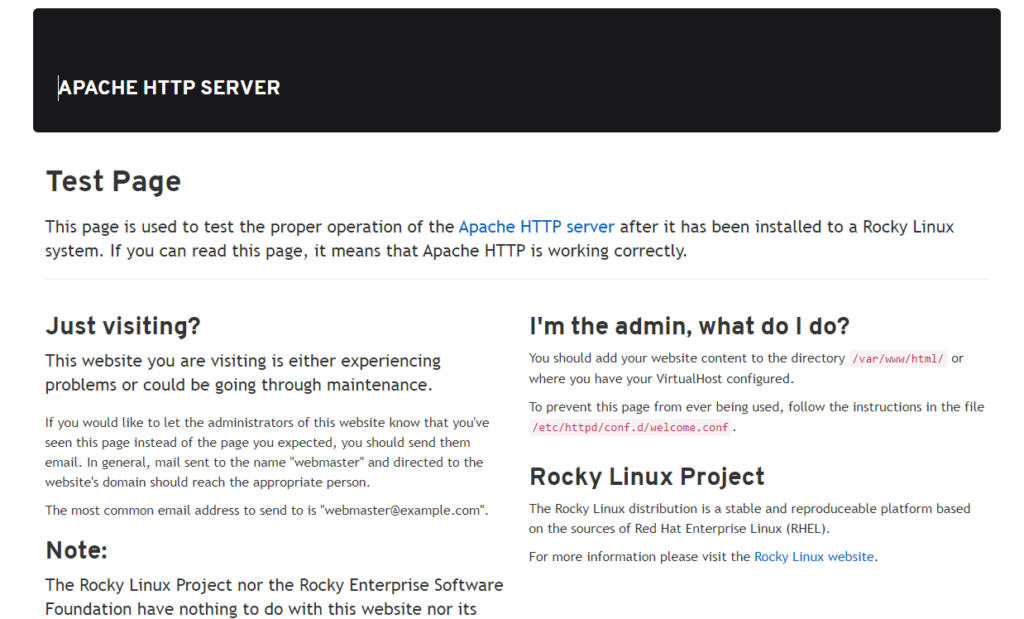
apacheのドキュメントルートは「/var/www/html/」となります。
試しに、以下の内容で編集して表示してみます。
## ファイル作成
sudo nano /var/www/html/index.html

<編集内容>

<html>
<body>
hello world
</body>
</html>
hello worldが表示されます。

設定ファイルは、以下の場所に存在します。
/etc/httpd/conf/httpd.conf-
前の記事
![cake phpエラー[MissingConnectionException] Database connection “Mysql” is missing, or could not be created.が発生した場合](https://mebee.info/wp-content/uploads/2019/08/php-150x150.png)
cake phpエラー[MissingConnectionException] Database connection “Mysql” is missing, or could not be created.が発生した場合 2021.06.23
-
次の記事

node.js sqliteと接続してデータを表示する 2021.06.23





コメントを書く