React.js ライブラリ「react-simple-chatbot」を使用してchatbotを実装する
- 作成日 2020.04.19
- 更新日 2020.07.18
- React
- react-simple-chatbot, React.js, ライブラリ
ライブラリ「react-simple-chatbot」をインストールすると、chatのUIとbot機能の実装が簡単に可能です。ここでは、react.jsでreact-simple-chatbotを利用するための手順と簡単な使い方を記述してます。
環境
- OS CentOS Linux release 8.0.1905 (Core)
- node V12.13.1
- npm 6.14.2
- React 16.13.0
react.js環境構築
下記のコマンドで構築してます。ここでは、react-appという名前でプロジェクトを作成してます。
create-react-app react-appreact-simple-chatbotインストール
作成したプロジェクトに移動して、インストールします。
## 作成したプロジェクトに移動
cd react-app

## インストール
npm install react-simple-chatbot
react-simple-chatbot使い方
srcディレクトリにsample.jsと名前で下記のコードを記述します。
import React from 'react';
import ChatBot from 'react-simple-chatbot';

export const Sample = () => {
    return (
        <ChatBot
        headerTitle="チャットbot"
        recognitionEnable={true}
        steps={[
            {
            id: '1',
            message: 'お名前は?',
            trigger: '2',
            },
            {
            id: '2',
            user: true,
            trigger: '3',
            },
            {
            id: '3',
            message: '{previousValue}さん,はじめまして!',
            end: true,
            },
        ]}
        />
    )
}

export default Sample
次に、srcディレクトリ配下にあるApp.jsを下記のように編集します。
import React from 'react';
import Sample from './sample';
import './App.css';

function App() {
  const style = {
    width: "50%",
    margin: "0 auto",
    marginTop: 150
  };
  return (
    <div className="App">
      <div style={style}>
        <Sample />
      </div>
    </div>
  );
}

export default App;
実行します。
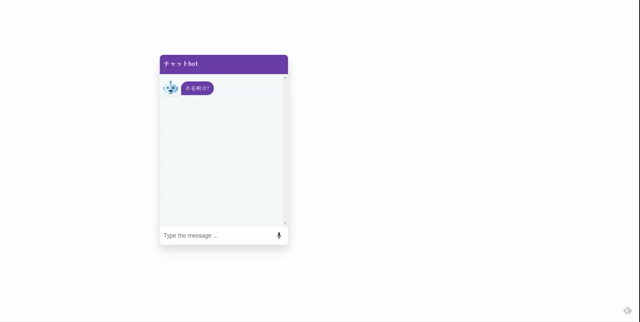
npm startブラウザから http://プライベートIP:3000にアクセスすると、 chatのUIとbot機能 が実装されていることが確認できます。
-
前の記事

Debian10上でタイムゾーンの設定と変更手順 2020.04.18
-
次の記事

linux httpやhttpsで接続しているクライアント情報を確認するコマンド 2020.04.20