Vue.jsのライブラリvue-particlejsをインストールしてパーティクルアニメーションを実装する手順
- 作成日 2020.02.10
- 更新日 2020.07.21
- Vue.js
- vue-particlejs, Vue.js
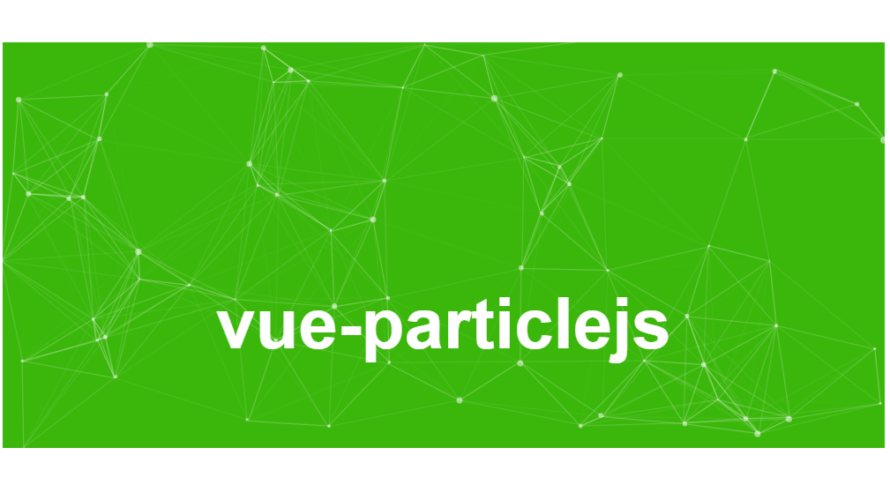
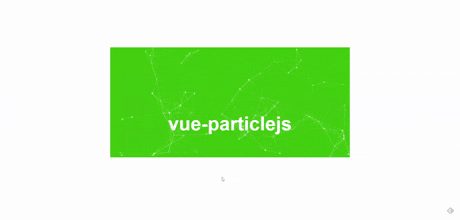
vue.jsのライブラリで、パーティクルアニメーションが比較的簡単に実装できる「vue-particlejs」の導入手順と簡単な使い方
環境
- OS CentOS 8.0.1905 (Core)
- node v12.13.1
- npm 6.13.2
- @vue/cli 4.1.1
Vue環境構築
下記のコマンドで構築。今回は、vueappという名前でプロジェクトを作成してます。
vue create vueappプロジェクト作成時は、defaultを選択してます 。
Vue CLI v4.1.1? Please pick a preset: default (babel, eslint)vue-particlejsインストール
下記の手順でインストールします。
## 移動
cd vueapp

## インストール
vue i -S vue-particlejs
vue-particlejs 使い方
src配下のApp.vueを下記のように編集します。
<template>
  <div id="app">
    <div id="demo">
      <div id="inner-demo">
        <h1>vue-particlejs</h1>
      </div>
    </div>
    <VueParticle domId="demo" :config="particleConfig"/>
  </div>
</template>

<script>
import VueParticle from 'vue-particlejs';

export default {
  components: {
    VueParticle
  },
  data() {
    return {
      particleConfig: {
        particles: {
          number: { value: 300, density: { enable: true, value_area: 800 } },
          color: { value: "#ffffff" },
          shape: {
            type: "circle",
            stroke: { width: 0, color: "#000000" },
            polygon: { nb_sides: 5 },
          },
          opacity: {
            value: 0.5,
            random: false,
            anim: { enable: false, speed: 1, opacity_min: 0.1, sync: false }
          },
          size: {
            value: 3,
            random: true,
            anim: { enable: false, speed: 40, size_min: 0.1, sync: false }
          },
          line_linked: {
            enable: true,
            distance: 150,
            color: "#ffffff",
            opacity: 0.4,
            width: 1
          },
          move: {
            enable: true,
            speed: 6,
            direction: "none",
            random: false,
            straight: false,
            out_mode: "out",
            bounce: false,
            attract: { enable: false, rotateX: 600, rotateY: 1200 }
          }
        },
        interactivity: {
          detect_on: "canvas",
          events: {
            onhover: { enable: true, mode: "repulse" },
            onclick: { enable: true, mode: "push" },
            resize: true
          },
          modes: {
            grab: { distance: 400, line_linked: { opacity: 1 } },
            bubble: {
              distance: 400,
              size: 40,
              duration: 2,
              opacity: 8,
              speed: 3
            },
            repulse: { distance: 200, duration: 0.4 },
            push: { particles_nb: 4 },
            remove: { particles_nb: 2 }
          }
        },
        retina_detect: true
      }
    };
  }
};
</script>

<style>
#app {
  font-family: 'Avenir', Helvetica, Arial, sans-serif;
  -webkit-font-smoothing: antialiased;
  -moz-osx-font-smoothing: grayscale;
  text-align: center;
  color: #2c3e50;
  padding-top: 150px;
  margin: 0 auto;
  width: 800px;
}
#demo {
  width: 100%;
  height: 50vh;
  background: #3BB70C;
}
#inner-demo {
  width: 100%;
  height: 0%;
  display: flex;
  align-items: center;
  justify-content: center;
  color: white;
  font-size: 2em;
}
#inner-demo h1 {
  position: relative;
  top: 4em;
}
</style>
起動します。
npm run serveブラウザから http://プライベートIP:8080 に アクセスするとパーティクルアニメーションが確認できます。
-
前の記事
Node.js expressを使ってMysqlに接続してデータを表示する 2020.02.10
-
次の記事
CentOs8 Python DjangoでWebアプリ開発環境の構築手順 2020.02.10