バリアブルフォント(Variable Font)を使用した簡単なhtml
- 作成日 2019.10.28
- 更新日 2020.07.21
- CSS Variable Font
- html, Variable Font

バリアブルフォントおもしろそうなので簡単なhtmlを実装してみた
環境
- WEBサーバー apache httpd
- OS CentOS Linux release 8.0.1905 (Core)
バリアブルフォントとは
バリアブルフォントとは、Adobe・Apple・Google・Microsoftが共同で開発した新しいフォントの規格。
下記のように、フォントの太さや字幅などを自由に調整することができる
Hello, World !!
「wght」と「wdth」を指定して、フォントの太さと幅をコントロール
対応ブラウザ
ブラウザの対応状況はこちらより確認できます。かなり対応されてます。
fontの入手
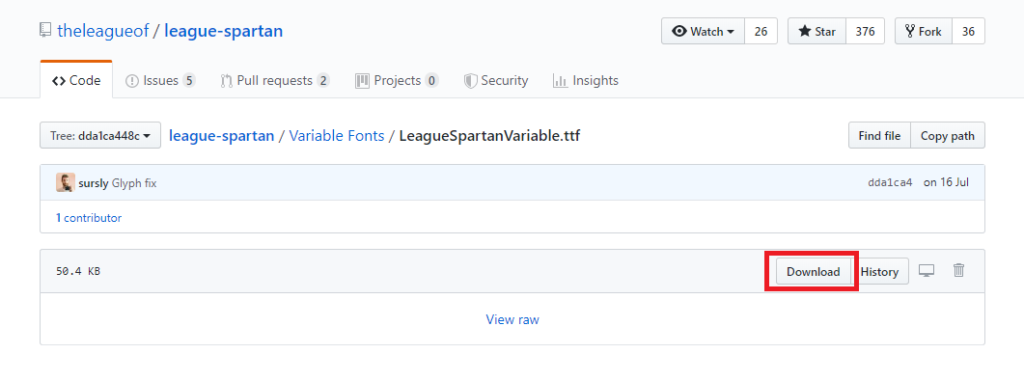
今回は「LeagueSpartanVariable.ttf」というフォントを利用してみる
入手先はこちらより可能。アクセスしたら「Download」ボタンをクリック
HTMLの作成
index.htmlという名前で下記のhtmlを作成する
<html>
  <head>
    <style>

    html {
      -ms-text-size-adjust: 100%;
      -webkit-text-size-adjust: 100%;
      -moz-osx-font-smoothing: grayscale;
      -webkit-font-smoothing: antialiased;
      box-sizing: border-box;
    }
    .container {
      min-height: 100vh;
      display: -webkit-box;
      display: flex;
      -webkit-box-pack: center;
       justify-content: center;
      -webkit-box-align: center;
      align-items: center;
      text-align: center;
    }
    @font-face {
      font-family: 'myfont';
      src: url('LeagueSpartanVariable.ttf') format('truetype');
    }

    p {
      font-family: 'myfont';
      color: #3BB60C;
      font-size: 7rem;;
      font-weight: 100;
      font-variation-settings: 'wght' 100, 'wdth' 70;
      animation: anime 3000ms infinite;
    }

    @keyframes anime {
      25% {
        font-variation-settings: 'wght' 100, 'wdth' 70;
      }
      50% {
        font-variation-settings: 'wght' 400, 'wdth' 100;
      }
      75% {
        font-variation-settings: 'wght' 100, 'wdth' 70;
      }
    }
  </style>
  </head>
  <body>
    <section class="container">
      <div>
        <p>Hello, World !!</p>
      </div>
    </section>
  </body>
</html>
後は、同じ階層に作成した「index.html」とダウンロードした「LeagueSpartanVariable.ttf」をWEBサーバーの公開ディレクトリに置くだけ
※下図の場合、公開フォルダの直下で利用
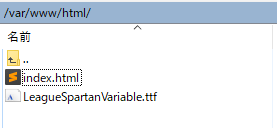
自分の環境だと、http://プライベートIP:81にアクセスすれば、Hello World!!が表示される
※httpd apacheが自分の環境だと81番ポートを利用している

装飾記号も可能
Zycon.ttf を利用することで、猫の実装も可能。
🐈
Zycon.ttf のダウンロードはこちらより可能
html
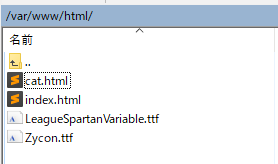
cat.htmlで保存して、さきほどと同様に、Zycon.ttfと同一階層にアップ
※cssが、src: url(‘Zycon.ttf’)と指定しているので同一階層にフォントをアップする必要があるだけで、パスは自由に設定可能です
<html>
  <head>
    <style>

    html {
      -ms-text-size-adjust: 100%;
      -webkit-text-size-adjust: 100%;
      -moz-osx-font-smoothing: grayscale;
      -webkit-font-smoothing: antialiased;
      box-sizing: border-box;
    }
    .container {
      min-height: 100vh;
      display: -webkit-box;
      display: flex;
      -webkit-box-pack: center;
       justify-content: center;
      -webkit-box-align: center;
      align-items: center;
      text-align: center;
    }
    @font-face {
      font-family: 'Zycon';
      src: url('Zycon.ttf');
    }

  .cat {
    font-family: 'Zycon';
    display: block;
    font-size: 10rem;
    color: #A18E5C;
    animation: meow 3000ms infinite alternate;
  }

  @keyframes meow {
    0% {
      font-variation-settings: 'T1  ' 0;
    }
    100% {
      font-variation-settings: 'T1  ' 1;
    }
  }
  </style>
  </head>
  <body>
    <section class="container">
      <div>
        <h2 class="cat">🐈</h2>
      </div>
    </section>
  </body>
</html>
ディレクトリ構成参考
-
前の記事
CentOs8に expressをインストールしてHello Worldまでしてみる 2019.10.28
-
次の記事

windows10 管理者権限でソフトを実行する方法 2019.10.29